This is the installation guide for how to install Ubuntu 18.04 operating system written step by step with the images and the explanations of each step for the installation. Instructions for installation of Ubuntu operating system are often not necessary because the process is quite simple.
Install Ubuntu 18.04 step by step with the partitions
Step 1 of Ubuntu installation
Download the latest Ubuntu that you want to install. You’re doing it here: https://www.ubuntu.com/download/desktop
Step 2 of Ubuntu installation
The file you downloaded is an ISO image. You can write it to a DVD or USB drive. Now most of us have a USB disk so I recommend this method: https://tutorials.ubuntu.com/tutorial/tutorial-create-a-usb-stick-on-windows#0
A USB disk is a much faster way to install Ubuntu – compared to a DVD installation.
Step 3 of Ubuntu installation
When you take an ISO image to a USB drive, insert that disc into the computer where you want to install Ubuntu. Start your computer. To install Ubuntu, it is necessary that the operating system is started from the USB drive you inserted. For example, on my computer, I have the option of choosing where to start the system: Hard disk, USB disk, DVD reader, and so on.
If you have this option and to install Ubuntu use a USB drive, select a USB drive from the boot menu, and wait for Ubuntu to load.
Step 4 of Ubuntu installation: Choose your language
And this is the first screen you see when Ubuntu is loaded. Here you are selecting a language, and whether you want to try Ubuntu first or go to the installation.

You can also select the Serbian language for installation, and after you can do this, you can start installing by clicking the Install Ubuntu button:

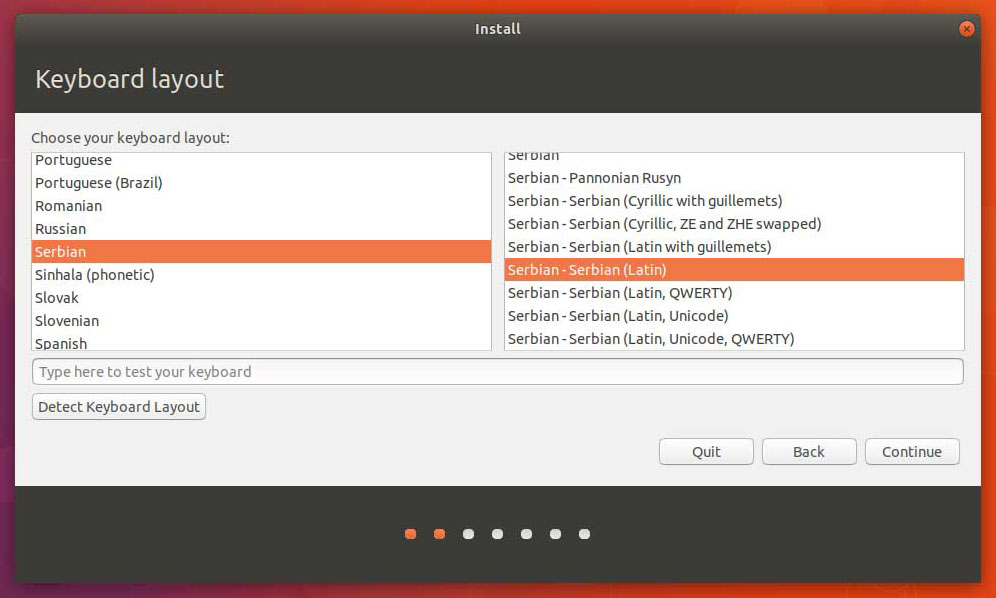
Step 5 of Ubuntu installation: Choose your keyboard layout
Here you need to select the keyboard that will be used. It is recommended that you select the starting point as shown in the picture below (choose your own language and keyboard):
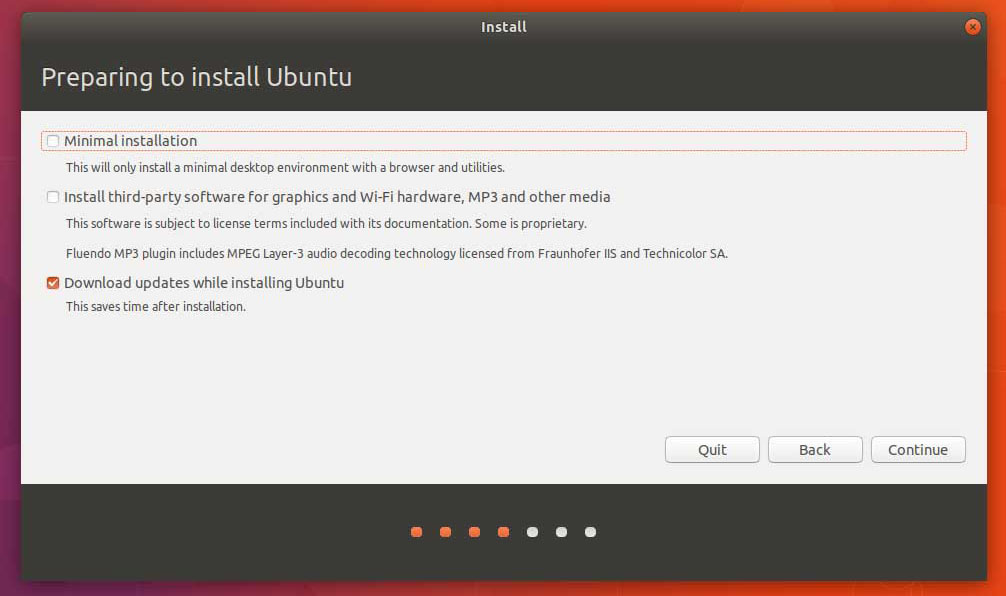
Step 6 of Ubuntu installation
Note the first option for a minimal installation. If you choose this option, you will get Ubuntu that only has an Internet browser and basic programs. It suits me, but it may not suit you. If you are using Ubuntu for the first time, do not check this field.
You can freely tick the other two fields. In addition to each field, you have written down and what they are related to.
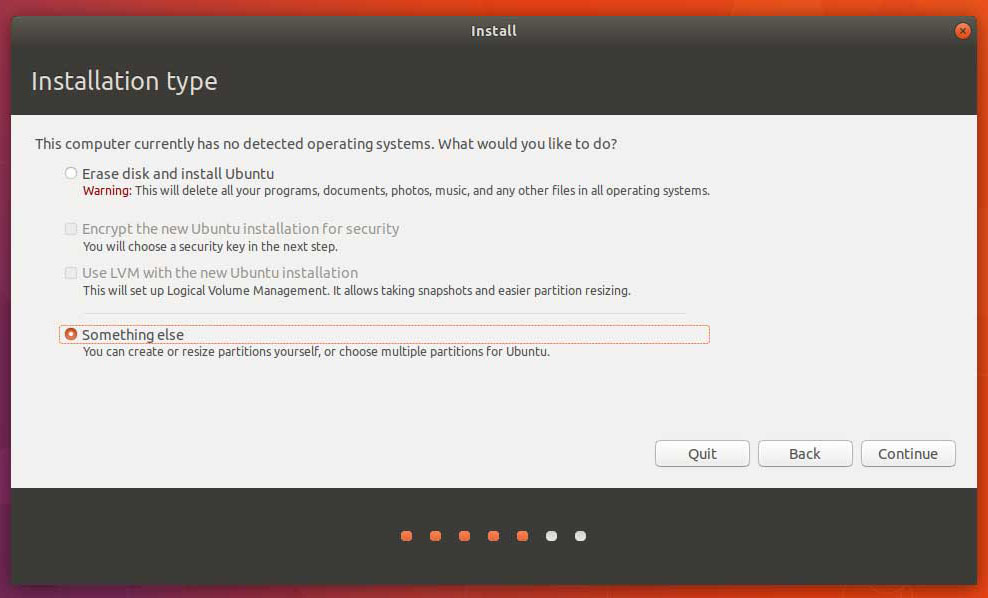
Step 7 of Ubuntu installation
Since this instruction refers to an installation with an explanation for creating partitions, we select the option Something else.
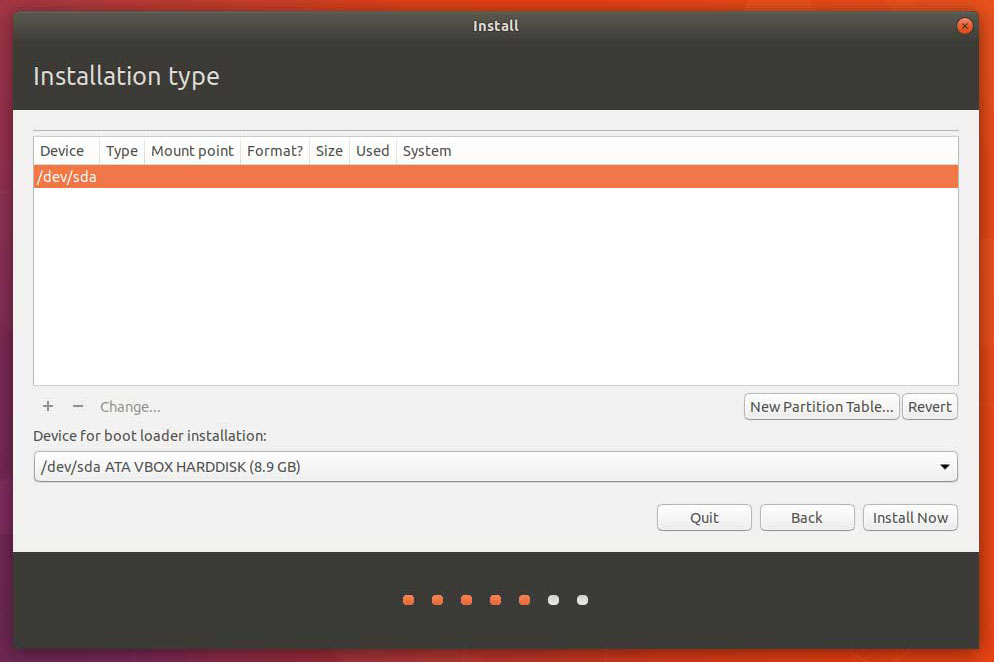
Step 8 of Ubuntu installation
Since you have an empty hard disk on your computer, it will be displayed right under the name /dev/sda. You need to create a new partition table by clicking New Partition Table …
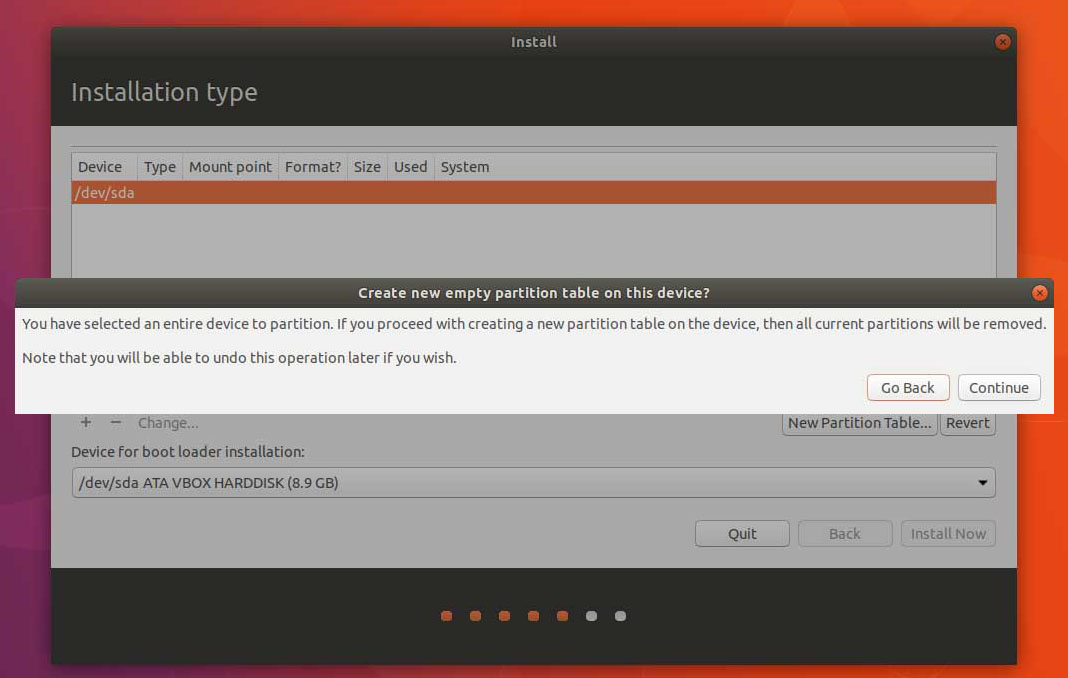
Step 9 of Ubuntu installation
You will see a warning saying that if you continue any existing partitions (if any) you will be deleted. If you have an empty new hard drive then everything is fine. It’s OK if you have a hard disk with data that you no longer need. It’s not OK if you have a hard disk with the information you need. Think before you click Continue.
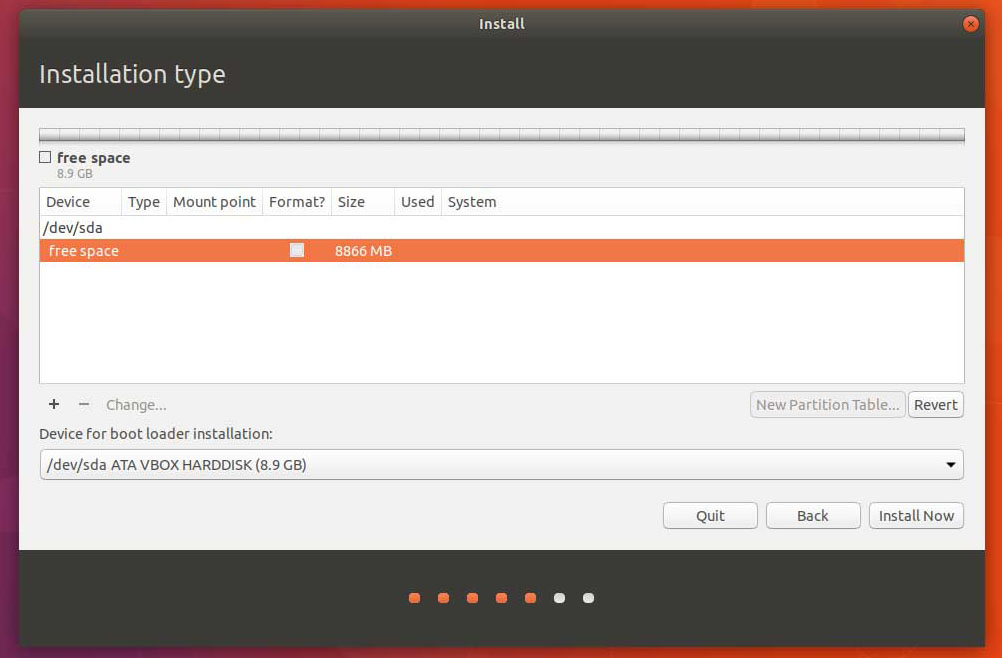
Step 10 of Ubuntu installation
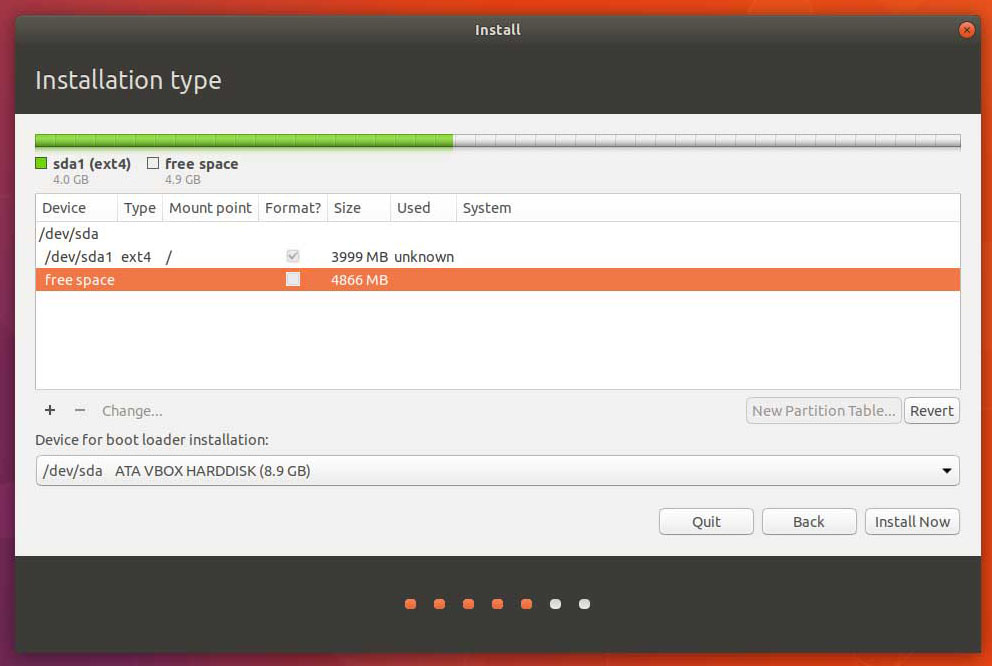
This looks like a new partition table. You have a device called /dev/sda and an empty space within that device that is marked as free space for now.
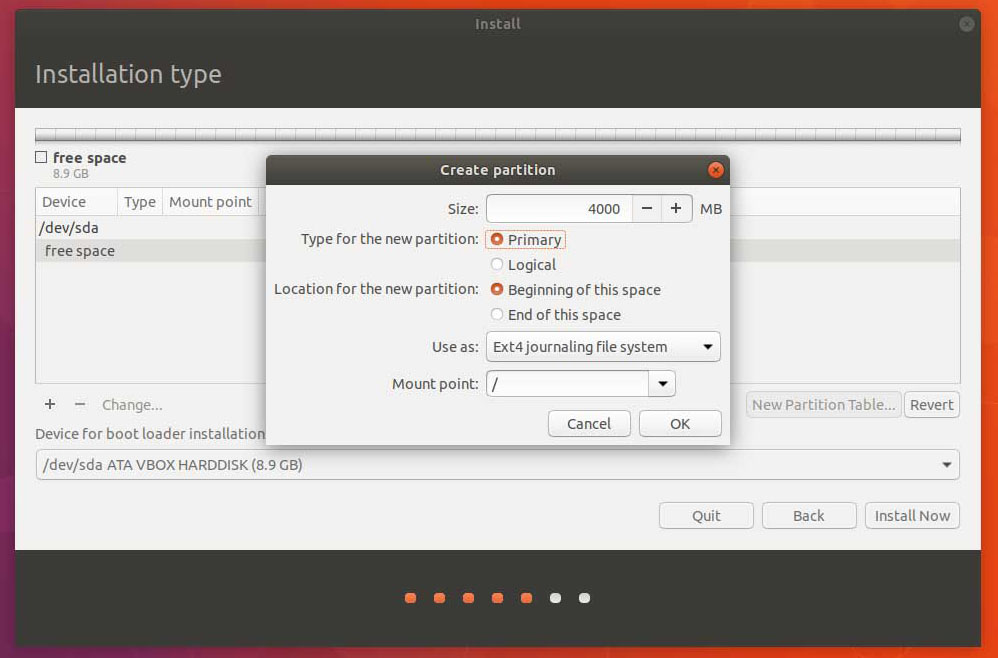
Step 11 of Ubuntu installation – Root partition
We now add the Root partition. We can do this by clicking the + sign below the disk space and partition table. The window will open like in the picture below where the following should be entered:
- Size: Enter the size for this partition in MB. Do not go below 15 GB.
- Type for the new partition: Primary
- Location for the new partition: Beginning of this space
- Use as: Ext4 journaling file system
- Mount point: /
To save the partition, click OK.
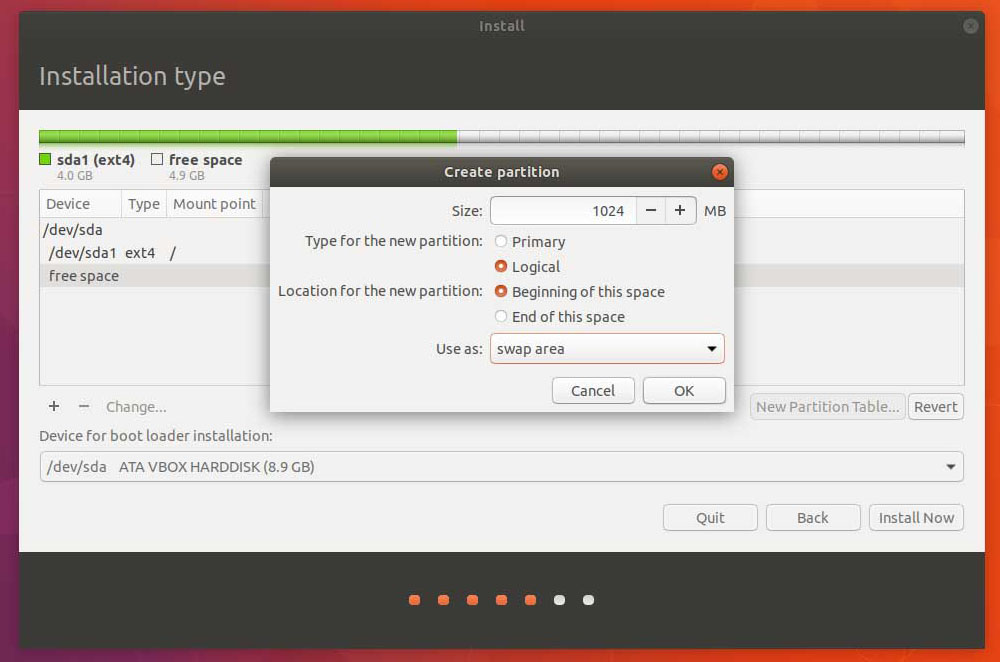
Step 12 of Ubuntu installation – Swap partition
This is how our partition table now looks like with a single partition we just created. Let’s go ahead and click the + button to add a new partition.
In the window that opens, enter the following:
- Size: Enter the size of this partition in MB. Usually, the amount twice as your RAM is.
- Type for the new partition: Logical
- Location for the new partition: Beginning of this space
- Use as: swap area
To save the partition, click OK.
Step 13 of Ubuntu installation – home partition
This is how our partition table looks like now. The rest is that we are still creating a partition for all user files. Click + to add a new partition to the remaining empty space.

You need to enter the following details to create a new partition:
- Size: Enter the size for this partition in MB. You can assign all the remaining disk space.
- Type for the new partition: Logical
- Location for the new partition: Beginning of this space
- Use as: Ext4 journaling file system
- Mount point: /home
To save the partition, click OK.

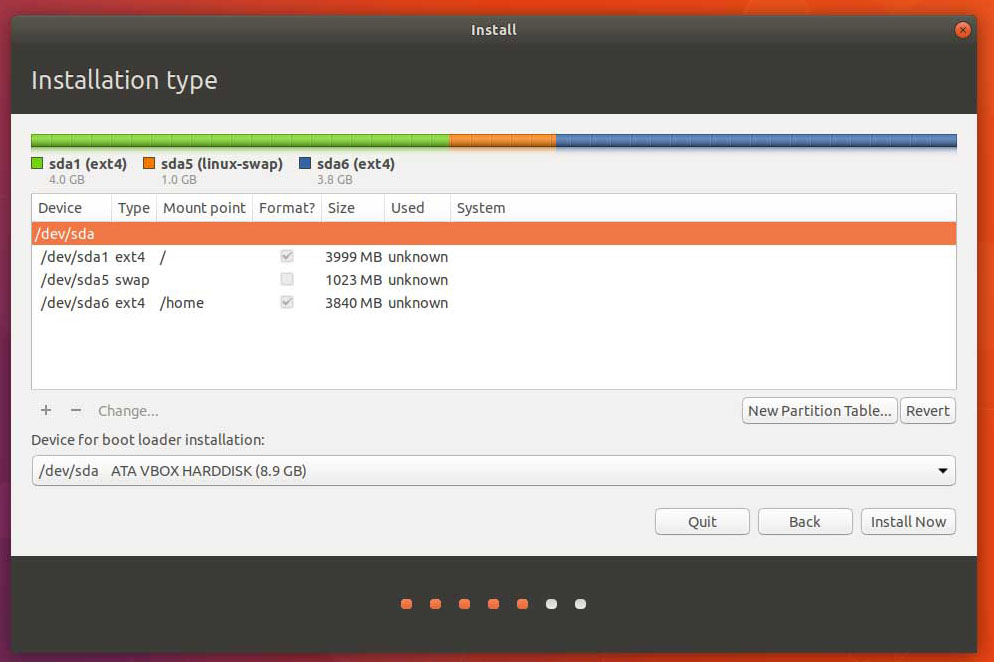
Step 14 of Ubuntu installation
This is how our partition table now looks like with all three partitions we need to work. To continue the installation, click the Install Now button.
If you have set up a too small root partition, you will receive this notification. Read what it says and correct the mistakes, or if you know what you are doing, click on the Continue button.

Here in the next screen you will have a note on what will happen to the partitions. You can read it to get to know the installation process a little bit and learn something new.

Step 15 of Ubuntu installation
Select the location where you are.

Step 16 of Ubuntu installation
Enter your information, such as your name, the computer name you selected, your username and password. Remember a good username and password because you will need it when working with Ubuntu.
Also, here you choose whether the password will be required when the system is turned on or the user will be turned on automatically when someone comes in and turns on the computer.

Step 17 of Ubuntu installation
And that is that. It’s not difficult, and you can learn a bit about the partitions on the hard disk and the basics of installing a single operating system based on Linux.

Call for help!
It’s hard, I know. For the first time, I really did not know what the partition was, but in the long run I learned it. So do you, slowly. If you need help, tap a comment or email via the contact form. You have a link to the contact form above in the menu. Good luck!