Here I will write a complete guide on how to install WordPress on Ubuntu server.
For this purpose I will be using Ubuntu 22.04 and a VPS server that I rented specifically to prepare this tutorial.
After this installation of WordPress on Ubuntu Server you will be able to have and run a site on Ubuntu Server just like you would on any hosting.
In the first part of the tutorial I will show the main part of the installation, while you can find the answers to the questions at the end of this text.
Note 1: This tutorial for installing WordPress on an Ubuntu server requires you to have minimal knowledge to access the server via SSH connection.
It also requires that you can follow and understand the instructions written here, as well as that you can understand whatever is written in response to the commands.
For example, there will often be a need to approve an action with Yes in order for a certain piece of software to be installed, and I didn’t always specifically mention that during the tutorial because such an action is logically implied.
Note 2: We will use Nano to work in the text editor, so if you have never worked with this text editor, then choose another or see here how to use Nano.
Step 1: We need a server with Ubuntu operating system
As I mentioned before, for this tutorial I have leased a VPS server on which I will install Ubuntu.
I found this VPS server pretty cheap at $1.99/month. And additionally, I got three months of free VPN service.
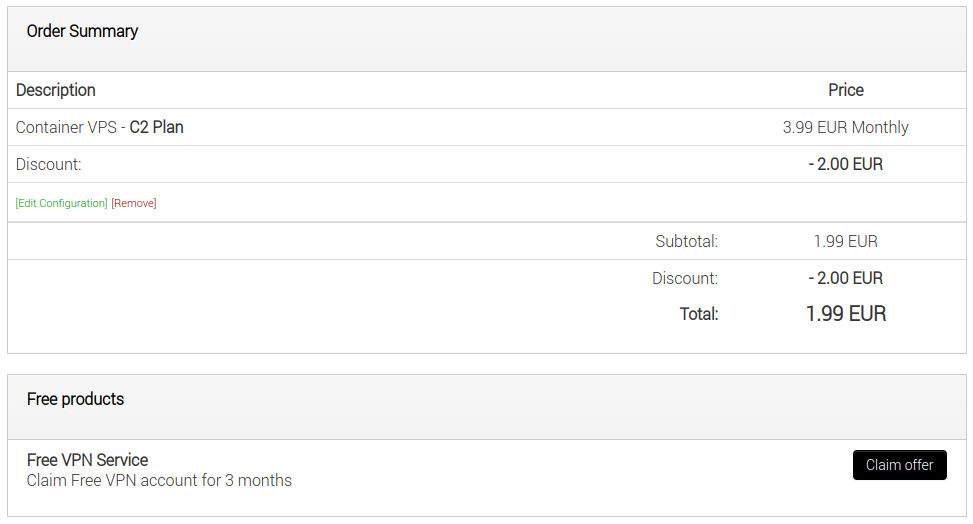
If you are also looking for a cheap and reliable VPS server on which you can have Ubuntu, take a look at Time4VPS.
I use them often and I like them because they activate servers quickly, installation and reinstallation of the operating system on the server can be done in 1 click.
Basically, the server is ready and I’m off to install Ubuntu:
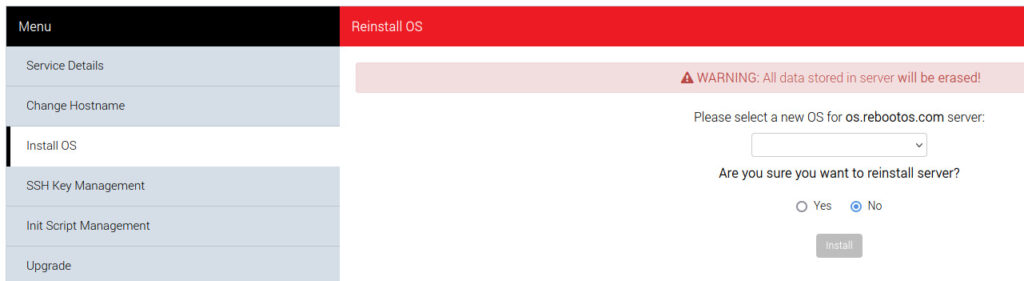
I just need to select the appropriate operating system from the drop-down menu, tick Yes and click the Install button.

The installation will usually be completed in about 4-5 minutes.
After installation, a notification like this will be displayed:
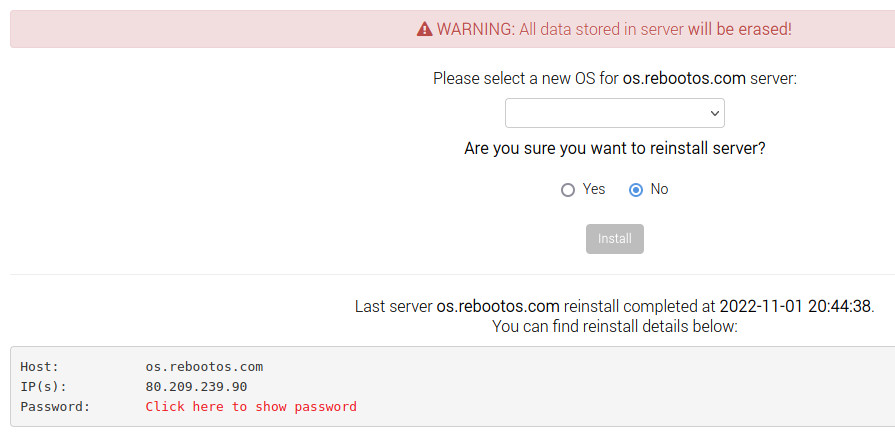
So you need to copy the IP address and password. The username will be root, while the SSH port will be the default 22.
Step 2: Connect to the server via an SSH connection
To connect to the Ubuntu server via an SSH connection, open a terminal and type:
ssh root@IP -p 22Replace the IP with the real IP address of your server. Press Enter.
The first time you log in to the server via SSH, you will need to answer Yes to the question:
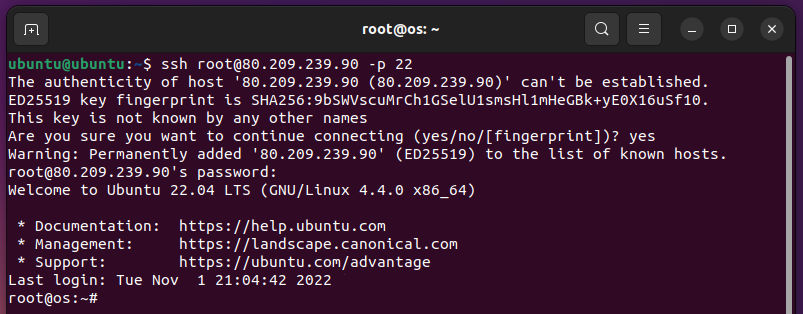
Now we can go further and one step closer to installing WordPress on Ubuntu server.
Step 3: Install Apache on Ubuntu server
In order for the site to be served on the Internet, we need Apache.
Update first:
apt updateThen install Apache:
apt install apache2The installation will require you to confirm the installation of the new package with Yes, and that’s fine.
Step 4: Install firewall and adjust your firewall settings to allow HTTP traffic
Now we can make a couple of changes to the Ubuntu Firewall – Uncomplicated Firewall (UFW).
UFW has diferent Apache profiles.
For the first time, you can use one of the existing profiles.
First install UFW:
apt install ufwAllow
List the Apache profiles:
ufw app listEach of these profiles has different ways of working:
- Apache: This profile opens only port 80 (unencrypted web traffic withous SSL)
- Apache Full: This profile opens both port 80 (unencrypted) and 443 (encrypted with SSL)
- Apache Secure: This profile opens only port 443 (SSL encrypted traffic)
To begin with we have to go with the first option and open only port 80 (because we don’t have SSL yet).
We will do this as follows:
ufw allow in "Apache"The response to the command should be:
root@os:~# ufw allow in "Apache"
Rules updated
Rules updated (v6)
Type the following command to allow SSH connections to your server:
ufw allow sshIf you allow access via SSH you will lose access to the server!
Enable UFW:
ufw enableAfter that, you need to get following status:
ufw statusroot@os:~# ufw status
Status: active
To Action From
-- ------ ----
Apache ALLOW Anywhere
22/tcp ALLOW Anywhere
Apache (v6) ALLOW Anywhere (v6)
22/tcp (v6) ALLOW Anywhere (v6)
root@os:~# Port 80 is now open for Apache and you can continue to work via SSH (this is also important).
Test whether everything is working correctly by entering the IP address of the server in your browser.
If you get a page like this, then everything is fine:
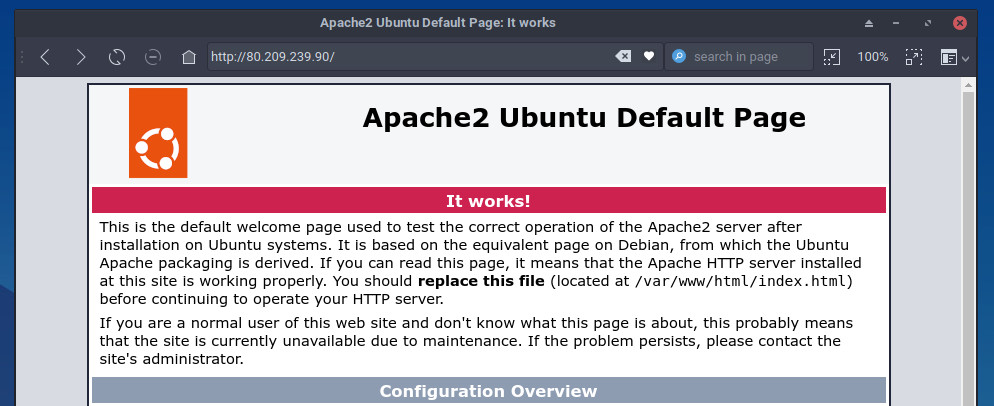
At this point we can move on and we are one step closer to installing WordPress on Ubuntu Server.
Step 5: Install MySQL on Ubuntu server – preparing for WordPress
MySQL is required to store data in the database. All those changes, texts and settings in WordPress are stored in the database (not in the files of WordPress itself).
Installing MySQL is easy:
apt install mysql-serverMySQL installation comes with a security script to help protect MySQL.
However, before we run the protection, let’s ensure against the following error:
… Failed! Error: SET PASSWORD has no significance for user 'root'@'localhost' as the authentication method used doesn't store authentication data in the MySQL server. Please consider using ALTER USER instead if you want to change authentication parameters.This error can occur on Ubuntu, so we need to set a password beforehand.
Start the MySQL:
sudo mysqlRun:
ALTER USER 'root'@'localhost' IDENTIFIED WITH mysql_native_password BY 'SetRootPasswordHere';Run:
exitYou can now run MySQL protection on Ubuntu:
mysql_secure_installationThis will ask if you want to configure the VALIDATE PASSWORD PLUGIN.
VALIDATE PASSWORD PLUGIN can be used to test passwords
and improve security. It checks the strength of password
and allows the users to set only those passwords which are
secure enough. Would you like to setup VALIDATE PASSWORD plugin?

Press y|Y for Yes, any other key for No:
It is best to confirm with Yes and select the password validation sensitivity level.
There are three levels of password validation policy:

LOW    Length >= 8
MEDIUM Length >= 8, numeric, mixed case, and special characters
STRONG Length >= 8, numeric, mixed case, special characters and dictionary              file

Please enter 0 = LOW, 1 = MEDIUM and 2 = STRONG:
The server will ask you to enter the MySQL root password (it is not the server root password) and we have already created it before, see above.
Estimated strength of the password: 100
Do you wish to continue with the password provided?(Press y|Y for Yes, any other key for No) :
This completes the installation of MySQL on the Ubuntu server. Verify that MySQL is running:
mysqlYou should get a printout like this:
Welcome to the MySQL monitor.  Commands end with ; or \g.
Your MySQL connection id is 10
Server version: 8.0.28-0ubuntu4 (Ubuntu)

Copyright (c) 2000, 2022, Oracle and/or its affiliates.

Oracle is a registered trademark of Oracle Corporation and/or its
affiliates. Other names may be trademarks of their respective
owners.

Type 'help;' or '\h' for help. Type '\c' to clear the current input statement.

mysql>
Just type in:
exitAfter that you have exited the MySQL console and we can move on.
Step 6: Install PHP on Ubuntu server
We installed Apache so content could be served online, we installed MySQL so the site could write data, we installed a firewall to keep uninvited guests out.
Now we also need PHP to display dynamic site content to the visitor.
We need php, libapache2-mod-php (enable Apache to handle PHP files), php-mysql (PHP module that allows PHP to communicate with MySQL-based databases). Other, and additional packages will be installed as dependencies.
apt install php libapache2-mod-php php-mysqlAfter installation, run this command to check the current PHP version:
php -vIn my case I got the following, and that’s fine:
root@os:~# php -v
PHP 8.1.2-1ubuntu2.6 (cli) (built: Sep 15 2022 11:30:49) (NTS)
Copyright (c) The PHP Group
Zend Engine v4.1.2, Copyright (c) Zend Technologies
with Zend OPcache v8.1.2-1ubuntu2.6, Copyright (c), by Zend Technologies
Now we have completed the part called LAMP installation on Ubuntu server. Congratulations, champion!
We’re moving forward and getting closer to the final installation of WordPress on Ubuntu Server.
Step 7: Create a Virtual Host for your WordPress
In order to shorten this long guide to installing WordPress on Ubuntu Server, I will only give brief guidelines and not explain much. I will prepare a new guide for creating a virtualhost on Ubuntu.
Replace your-domain with your domain in all commands!
To start creating a virtual host on Ubuntu type:
mkdir /var/www/your-domain
Assign user to folder:
chown -R $USER:$USER /var/www/your-domain
Create a new Apache configuration file and configure the new domain:
nano /etc/apache2/sites-available/your-domain.com.conf
Add this text and replace your_domain with your real domain:
<VirtualHost *:80>
    ServerName your_domain
    ServerAlias www.your_domain
    ServerAdmin webmaster@localhost
    DocumentRoot /var/www/your_domain
    ErrorLog ${APACHE_LOG_DIR}/error.log
    CustomLog ${APACHE_LOG_DIR}/access.log combined
</VirtualHost>
Enable new virtual host with:
a2ensite your-domainRestart Apache:
systemctl reload apache2Disable default apache virtual host:
a2dissite 000-defaultRestart Apache:
systemctl reload apache2Test if the content from the site folder location can be displayed publicly. We will set up WordPress later on in that location.
nano /var/www/your-domain/index.html
Now open a browser and go to the address of your site:
We’ve also installed PHP before and now it’s time to test:
nano /var/www/os.rebootos.com/info.php
Write this into file:
<?php
phpinfo();
Go to your-domain/info.php and you should get a page like this:
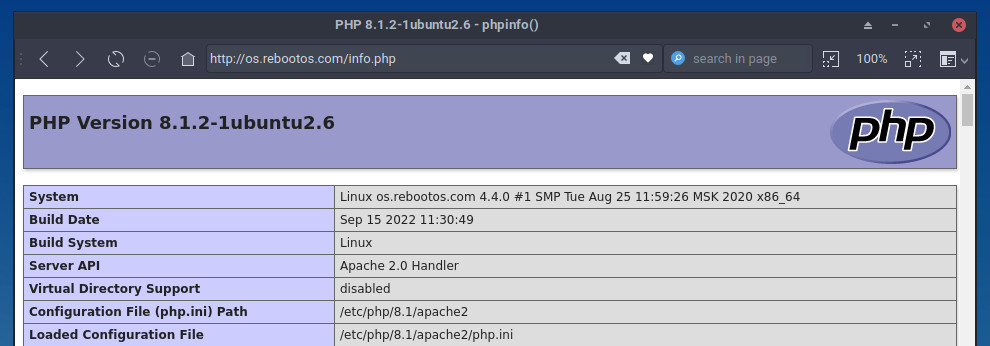
If all the tests have passed, we can move on.
Step 8: Create a MySQL Database and User for WordPress
To create MySQL Database and user for WordPress run:
mysql -u root -pNow create a new database “wordpress” (you can choose any name for the database) on the Ubuntu server:
CREATE DATABASE wordpress DEFAULT CHARACTER SET utf8 COLLATE utf8_unicode_ci;Create a user to use the database. This is an example of ‘wordpressuser’ and you can create any user, also replace ‘PASSWORD’ with with a much stronger password:
CREATE USER 'wordpressuser'@'%' IDENTIFIED WITH mysql_native_password BY 'PASSWORD';Grant all privileges to the user over the base:
GRANT ALL ON wordpress.* TO 'wordpressuser'@'%';Refresh the privileges to make the new ones current:
FLUSH PRIVILEGES;and exit from MySQL:
EXIT;Be sure to write the name of the database, database user and password somewhere on the side. You’ll need it later.
Step 9: Install Additional PHP Extensions
For WordPress to work we will need additional PHP extensions.
apt updateAfter update, run:
apt install php-curl php-gd php-mbstring php-xml php-xmlrpc php-soap php-intl php-zipFor all extensions to be loaded, restart Apache:
systemctl restart apache2We can continue after restarting Apache on Ubuntu.
Step 10: Enable .htaccess
We need to setup .htaccess overrides. WordPress and plugins use .htaccess to work and need to be able to use it.
Open your site’s Apache configuration file (we created it earlier)
/etc/apache2/sites-available/your-domain.confand add the following:
<VirtualHost *:80>
. . .
    <Directory /var/www/wordpress/>
        AllowOverride All
    </Directory>
. . .
</VirtualHost>
We’ll just append the existing file we created earlier:
<VirtualHost *:80>
    ServerName os.rebootos.com
    ServerAlias www.os.rebootos.com
    ServerAdmin ivanblagojevic@gmail.com
    DocumentRoot /var/www/os.rebootos.com
    ErrorLog ${APACHE_LOG_DIR}/error.log
    CustomLog ${APACHE_LOG_DIR}/access.log combined
    <Directory /var/www/your-domain/>
        AllowOverride All
    </Directory>
</VirtualHost>
We can go further.
Step 11: Enable mod_rewrite on Ubuntu server
In order for permalinks to work well and be beautiful, we need this option.
We turn it on as follows:
a2enmod rewriteand restart Apache:
systemctl restart apache2Check the syntax of the changes we made:
apache2ctl configtestWe should get this:
# apache2ctl configtest
Syntax OK
This means the syntax is fine and we can move on. Another step closer to installing WordPress on Ubuntu Server.
Step 12: Download WordPress into Ubuntu server
Soon everything will be done and WordPress will be installed.
Go to /tmp:
cd /tmpDownload the latest WordPress:
curl -O https://wordpress.org/latest.tar.gzExtract the compressed file:
tar xzvf latest.tar.gzWe will be moving this installation soon so you can create a simple .htaccess file to make the installation available:
touch /tmp/wordpress/.htaccessCreate a wp-config.php file that does not currently exist:
cp /tmp/wordpress/wp-config-sample.php /tmp/wordpress/wp-config.phpCreate the upgrade directory:
mkdir /tmp/wordpress/wp-content/upgradeCopy all the WordPress files from this location to the location from which the site should run:
cp -a /tmp/wordpress/. /var/www/your-domainStep 13: Adjust the ownership and permissions
On all Linux operating systems and systems in general, files and folders need to have the correct permissions and ownership.
Assign the correct ownership to the main folder where the site is located:
chown -R www-data:www-data /var/www/Set the correct permissions on all folders in that folder:
find /var/www/your-domain/ -type d -exec chmod 750 {} \;Set the correct permissions on all files in that folder:
find /var/www/wordpress/ -type f -exec chmod 640 {} \;These are some basic permissions that usually work for all purposes.
Step 14: Define WordPress secret keys in wp-config.php file
We need this to further secure our WordPress on Ubuntu.
Type the following:
curl -s https://api.wordpress.org/secret-key/1.1/salt/You will get something like this:

Copy that (from your console).
Open wp-config.php file:
nano /var/www/your-domain/wp-config.phpDelete default rows from wp-config.php file:
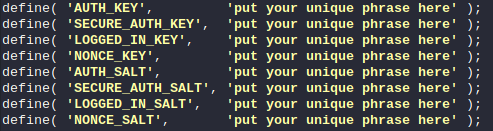
and replace it with lines that you get earlier.
Step 15: Enter the data to connect to the database
Earlier we created one database. Now it’s time to write that data into the wp-config.php file so that the site has to communicate with the database and write the data:
nano /var/www/your-domain/wp-config.phpFind these lines:

Instead of database_name-here write database name.
Instead of username_here write username.
Instead of password_here write password.
Save and switch to browser. We are done with the server for now 🙂
Step 16: Install WordPress on Ubuntu server
Open a browser and enter the site address. If you see this picture, you did everything right.
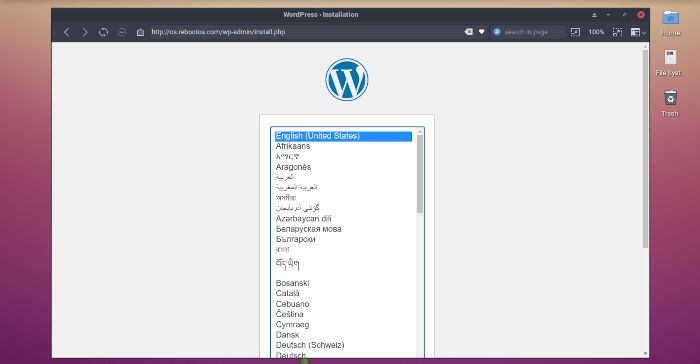
Now you can select the language in the WordPress installation and continue. You don’t need my help here.
Congratulations on your success and thank you for following my instructions to the end.