When it comes to change eye color in the photograph?
Changing eye color is done usually for pleasure or to improve, highlighting and emphasizing the message that the viewer should be transmitted. The eyes are magical. The pages that are displayed eyes retain attention. The eyes in the pictures subconsciously trigger mechanism in men telling them to get ahead of them is a living being, although it comes from an Internet page.
Tools that can be installed on the phone are not good enough. Many tools with filters of Instagram offer this option, but they are not sufficiently accurate and adjustable. Operate on the principle “or can or can not.”
For every serious work and best results use tool for digital image processing. Some of the better known are:
- Adobe Photoshop
- GIMP
- Krita
What I write here?
This is the instruction for changing eye color in Photoshop using Hue/Saturation masks, brushes, and a blending mode. This guide can accompany any beginner without previous knowledge in the field of digital image processing. If we learn the manual, the result of which you will get is comparable to the photographs that you see in fashion magazines or websites, so please read carefully.
The quality of the photos that you process
Choose the larger, illuminated and sharp pictures taken with the camera or a better phone. Better quality of the original image guarantees good quality of the final product.
Photos in which the eyes are too far away or in the shade, it is difficult to perform change eye color. It’s not impossible, but it is tasteless because in that case, you have to emphasize the eyes and add vibrant color to make them visible.
Try to make the eyes look as natural as possible and with all the details that otherwise have (do not cover). You can paint the eyes and in an unnatural color, but look at the amount of color and highlighter set in the most natural way. Again, it depends on the environment, lighting and image quality. The constant repetition and practice what you cannot avoid if you want to be good at what you do.
Changing the eye color by using Hue / Saturation mask
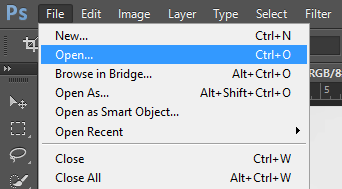
Open a photo where there are eyes whose color you want to make loans. Go to File-Open or use the key combination (press them simultaneously) Ctrl + O. In the window that opens, locate the photo and open it.
 The quality of this manipulation depends on the image quality. Depends on the position, size, and exposure to the eyes. If the eyes are dark or in shadow, many changes can be counterproductive if they depart from the environment and lighting conditions prevailing in the picture.

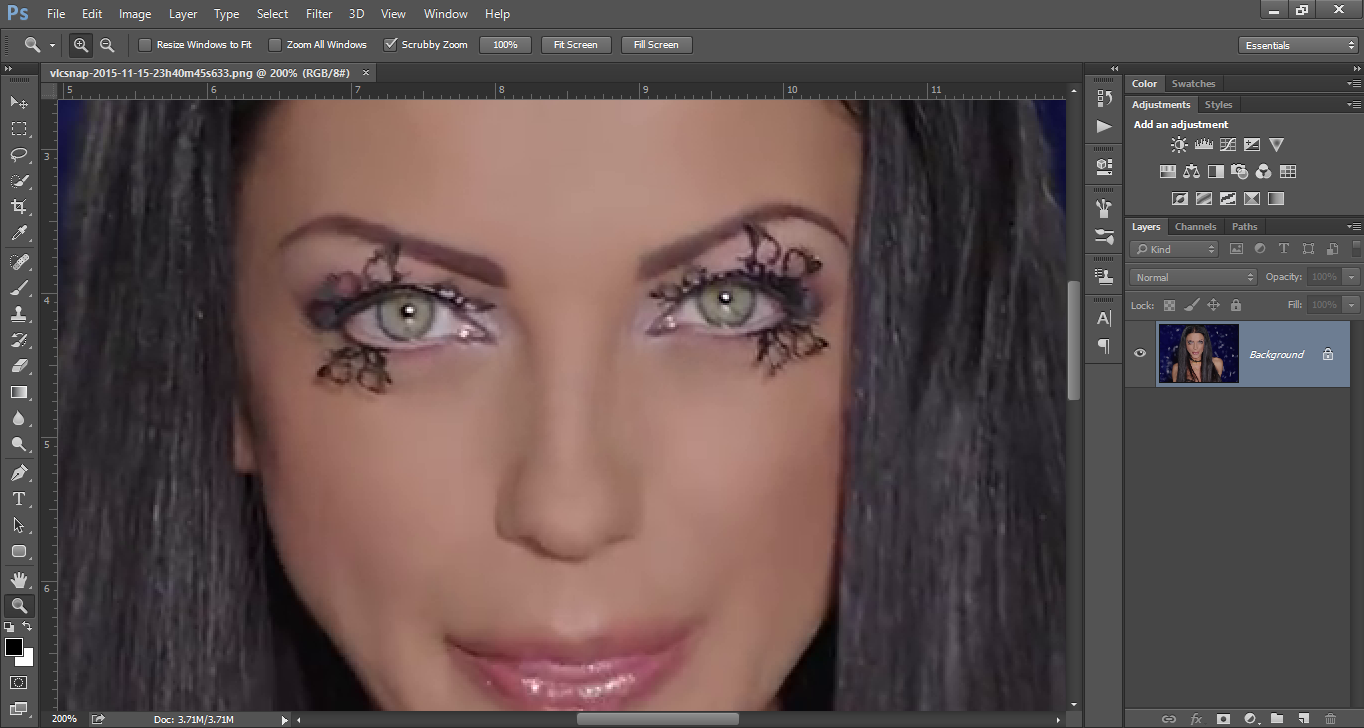
Use the Zoom tool to magnify the image to the extent that you will easily be able to work with details such as eyes. Keyboard shortcut for this tool is key Z.
 It is enough when the image is in size so the details of the eye to be fully visible:
 Make a copy of the image is a combination of keyboard keys Ctrl + J (never making changes to the original). In the Layers, palette will appear in a new layer and you can give the name of a working copy, or any other descriptive name.
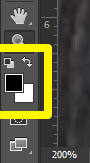
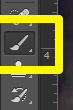
 Before anything else take the set Foreground and Background to the default values. It’s enough to make a keyboard shortcut – button D. Default of colors (black and white) can be seen in the image below.
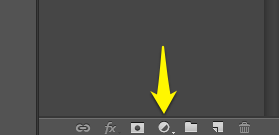
 Click the Set new fill or adjustment layer. It is located under the Layers palette:
 In the menu that appears, select Hue/Saturation:
 In the layers, palette will appear a new layer (mask) and the toolbar will open the options for setting the new layer. If right now you check the colorize, you will see that the color change occurs in the entire picture (you can try). What is needed further is that the change is visible only to the eyes. If you checked the Colorize option, uncheck it now.
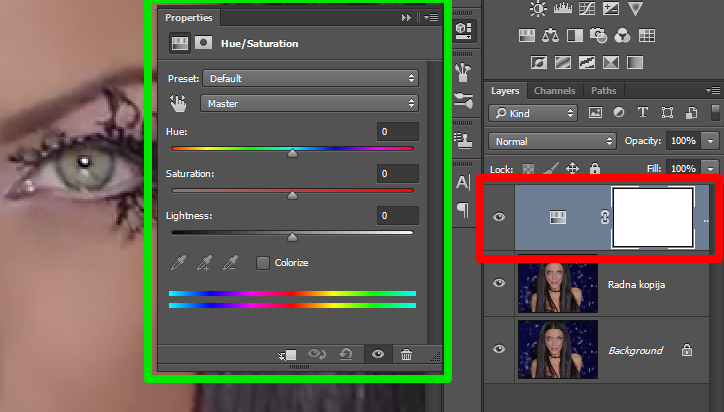
Click on the Layer Mask Thumbnail, or on a white surface – a rectangle in the Hue/Saturation mask in the Layers palette:

Use a combination of keys on the keyboard Ctrl + Backspace to fill the mask with black color:

Why? While the mask in white as in the beginning, all the changes that we work in a Hue/Saturation layer will be reflected on the whole image. Now that the mask is black in color, whatever we do in this layer will not be visible unless you make small slits for the eyes. And we will do so. Exactly where there are iris in the photograph we’ll create areas in which changes will be visible. Here’s how:
Turn the Brush Tool (keyboard shortcut – button B). Where be applied brush changes will be visible once you start to adjust the color balance Hue/Saturation mask.
 Adjust the brush size so that the correct occupies an area of iris of the eye. Perhaps it is best to take advantage of Soft Round brush (try it until you understand how it works because there are no sharp edges).
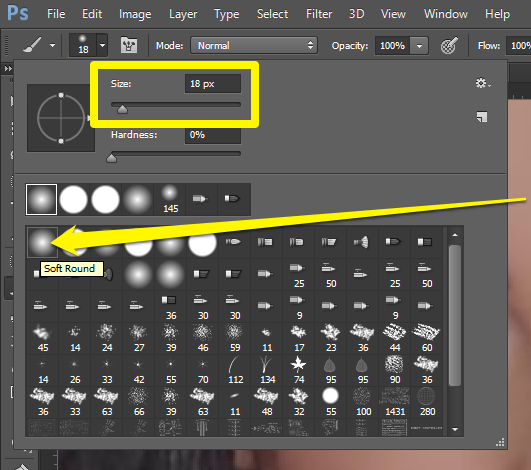
Set the brush size to fit exactly covers the iris of the eye. If the brush moves to the upper or lower eyelid ignore this detail, and I’ll explain how to work it out. So, let the brush (its circle) follow the line of the iris.
Replace now the position of Foreground and Background color using the toaster X or click the arrow in the Tools panel (see image below). At the beginning, we set default values button D.
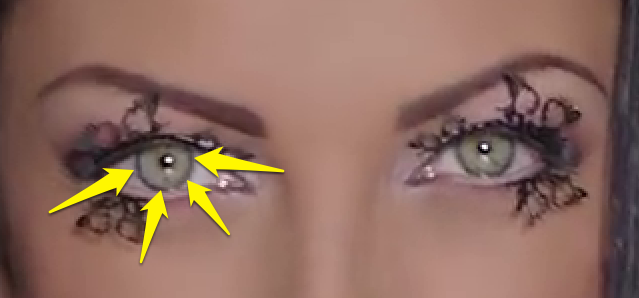
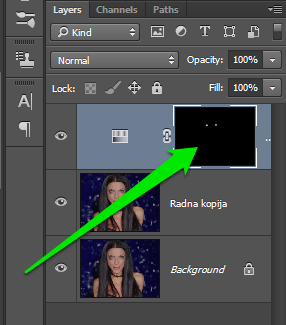
 Click one to each eye with brush that you select and adjust. If you do a good job on the panel of layers in the Hue/Saturation mask appears two dots (exactly where you clicked on the eyes) on the mask layer:
 Any changes that you are now working with the colors will be visible only to the eyes. All other details remain unchanged. Now click on the Layer Thumbnail (see picture below) to open the settings.
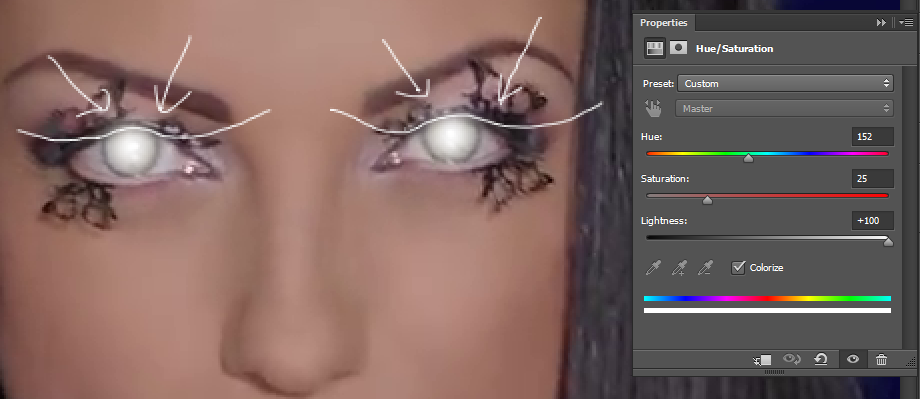
 If we re-check the option to colorize you will see a change in the eyes. Move the sliders Hue, Saturation and Lightness you find the right shade of paint you want to apply to the eyes.

Try several varieties. Reset settings by clicking the Reset to adjustment defaults if you are not satisfied, and try again.

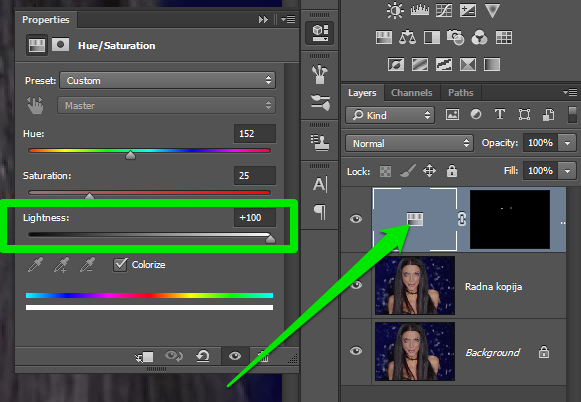
Let’s now take care of those details which, because roundness of the brush exceed the upper or lower eyelid.
Click the Layer Thumbnail to open the options in which to set the color. Set Lightness to +100.
Click again on the mask Hue/Saturation in the Layers palette. A few minutes ago we are using brush allow the color changes to be visible only in the eyes. In the same way we will reduce the effect that transcends boundaries.
Select the Brush Tool, change position again Foreground and Background color by pressing X. Here you can also reduce the size of the brush. Gently move the brush over the parts where you do not want to see the color change (eyelid).
Lightly treat all parts so that you get the effect is only visible over the surface of the iris of the eye.
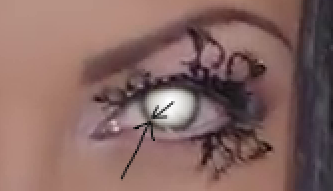
I personally prefer to deal with around so that you can see a dark line that surrounds the iris (image below). You do not have to, but you can try to see what happens. All details depend on the quality of the image itself, brightness, and eye color.
Click the Layer Thumbnail to open the options in which to set the color. Lightness Return to the default (0-zero).
Experiment and practice. Combine the values of all three sliders (Hue, Saturation, Lightness) with included Colorize option.

Do not overdo the colors and potency. Try to keep everything natural and pure. Try to be nice.

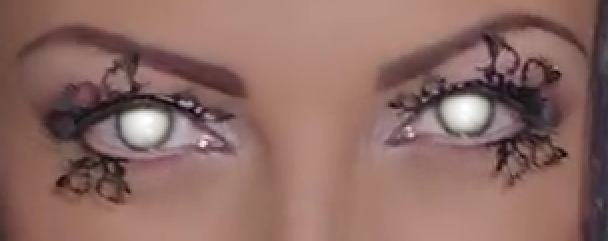
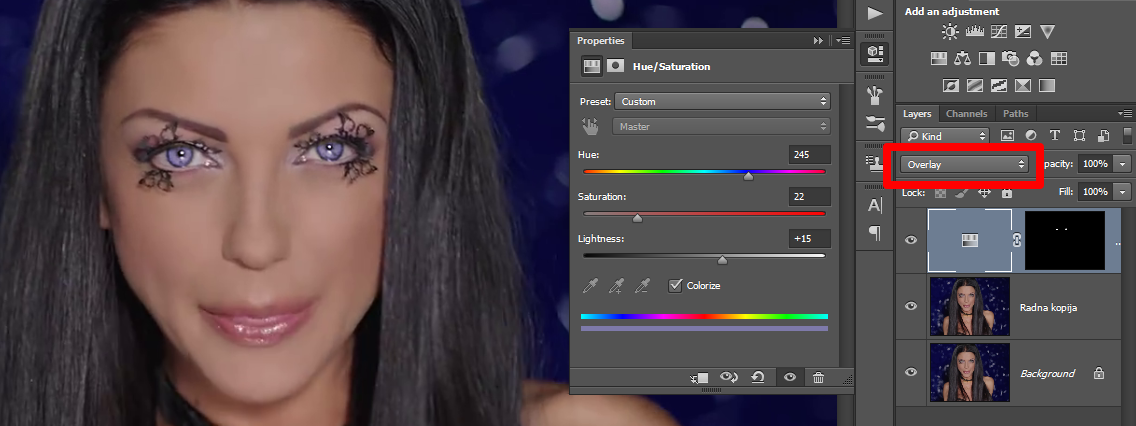
Let’s try something else. Click on the blending mode menu. In the dropdown menu, select Overlay.

Whatever color you chose earlier now it will have a more natural and more beautiful tone. The two images below are identical examples that I put above but with one difference – included Overlay blend mode.
It’s the same with green.

In the same way, you can process the other images. It is nice to fit in with the other eye image detail, hair or background:

When you finish a job, save the image by going to File, Save As.
If you do not understand, call me
This guide does not require significant knowledge in Photoshop, but some basic knowledge (importing photos, which are tools, work with layers) is not superfluous. If you’re still not sure what to do, we can write in the comments below or through the contact page. If you have a picture which you want to apply the change eye color, and you do not have Photoshop, I’ll do it. Let me know.
If you liked this guide, read and learn how to retouch the face in the photograph with the help of this text: Beginner’s guide to retouch facial photos in Photoshop.
