Installation of Ubuntu 14.04 LTS(long term support) or any other Ubuntu edition is generally not different from the previous versions. As was the case before, installation is easy and simple and can perform a complete beginner with little attention and learning.
This tutorial cover:
- Ubuntu 14.04 (or a newer release) installation on a new blank hard disk and/or
- Ubuntu 14.04 (or a newer release) installation on an already deleted hard disk
Universally required for any type of installation of Ubuntu:
- The downloaded ISO image from http://www.ubuntu.com/download/desktop/
- Blank DVD
- Patience for 20 to 30 min
Preparing to install Ubuntu – BIOS Setup
What does that mean?
This exactly means that we have to ensure that your computer run system that is on the DVD disk that we have prepared with Ubuntu on it.
How to set BIOS to boot the system from the DVD disk?
Start your computer, and on the first screen, you will see a button that allows you to adjust the BIOS. Often it is F2, F12, ESC etc. Usually, it looks like this when you start the computer. In this case, enter the BIOS setup is located on the DEL key.
Once you are in BIOS settings, look for BOOT options(like boot Device Priority).
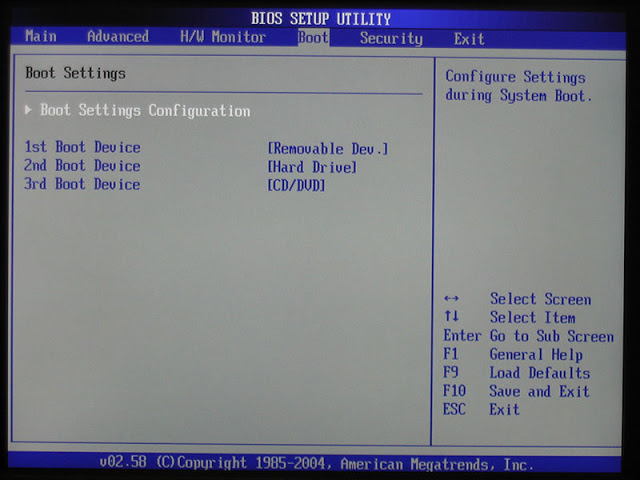
Make sure that the DVD device( in picture [CD/DVD] in the first place from the list that you see in the picture. If the system you are installing from a USB flash drive instead of a DVD, so be sure and indicate (just like in the picture), and set the removable device in the first place.
Save the settings. The computer will restart and boot from the disc that we have prepared if the disc is in the CD/DVD reader.
Is there an easier way?
Yes, of course. If your computer has a fast boot option, look for a button that launches this option and simply select the device that contains a disc that we have prepared.
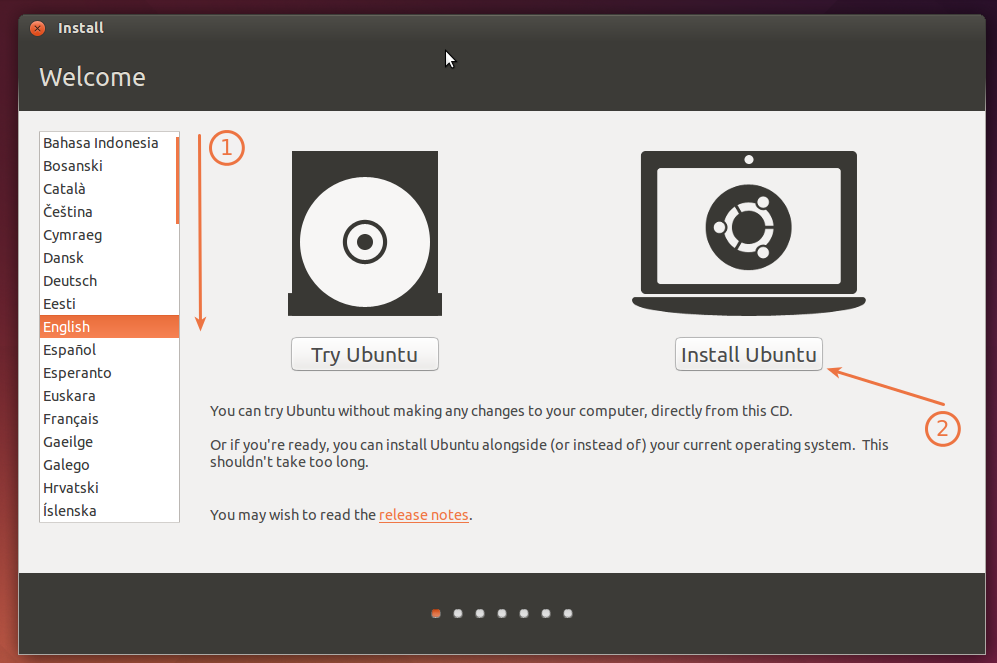
Welcome!
If you have all successfully completed this first step that leads to your new operating system.
1. Select the language you want to use in Ubuntu
2. Click on Install Ubuntu button.
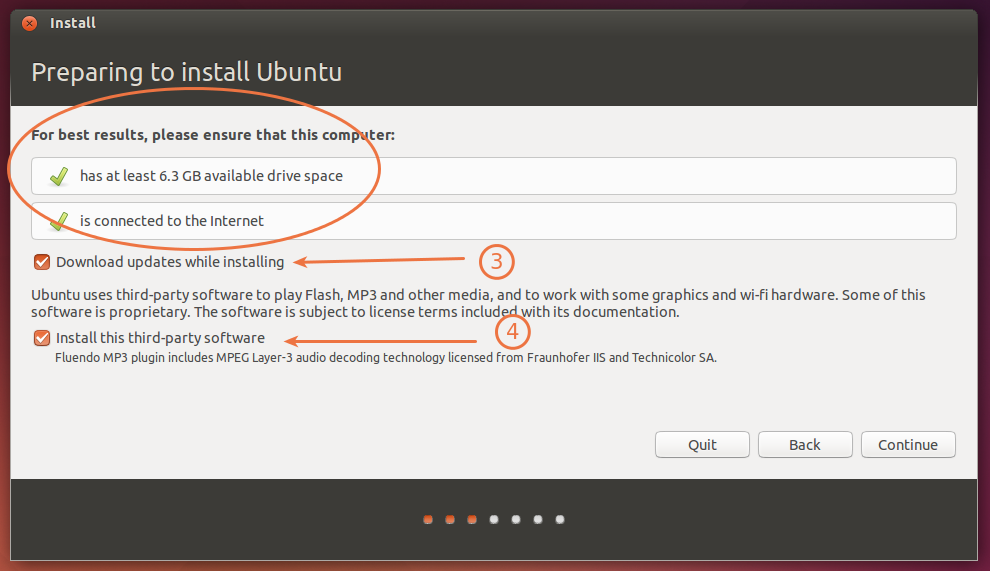
Preparing to install
Here are some pre-required items that must be met:
- 6.3 GB available drive space
- internet connection
3. This feature is optional (of course you can do it later), but if you want to immediately pick up the latest updates check this option.
4. This is also optional and if you want, if your school, business, land permitted in this way highlight this option.
After that click on Continue.
Installation type
This tutorial will deal with the last option that you see in the picture.
5. This option would use if you already have a partition on the disk that you want to edit. In the further course of instruction we will use this option to install Ubuntu on a completely empty hard disk.
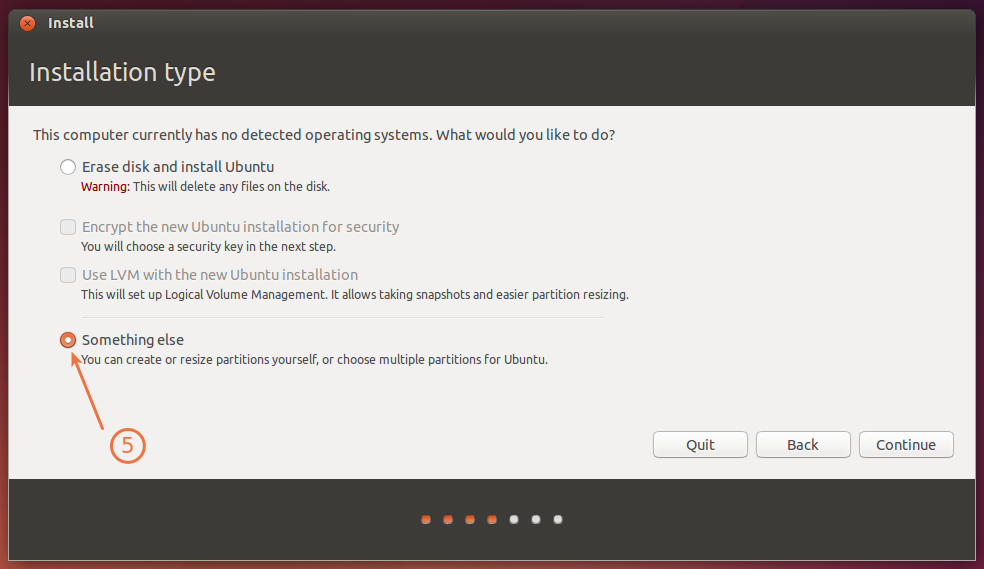
5a. If you are considering the first option, you should know that it deletes the drive completely and install Ubuntu with the Default settings automatically. All your data disappear and disc are automatically formatted (erased). This will be explained in another guide and further guidance will not go this way.

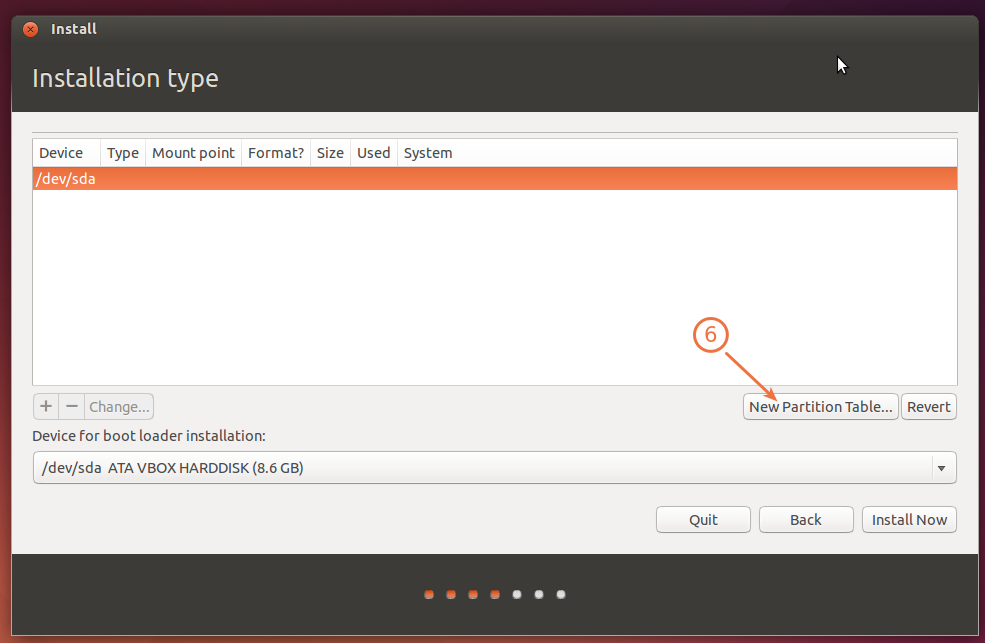
We know already that we have an empty hard disk. Now we need to set the partition table.
6. Use New Partition table button to set new partition table.
7. Select the Continue button if you read the warning.
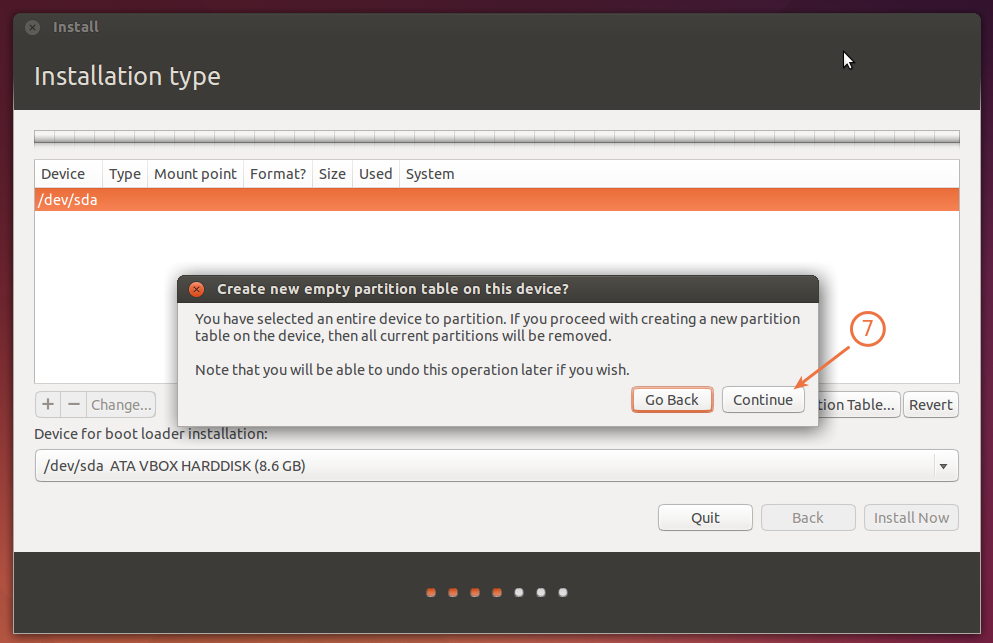
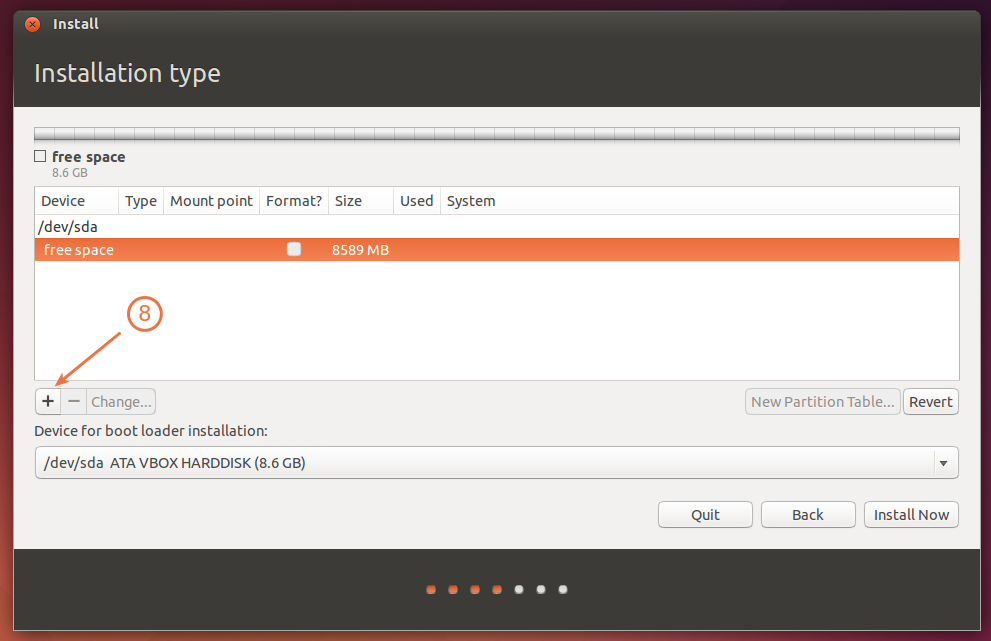
Free space in the table is “room” for our partitions. Now we create partitions.
8. Use + button to add the first partition:
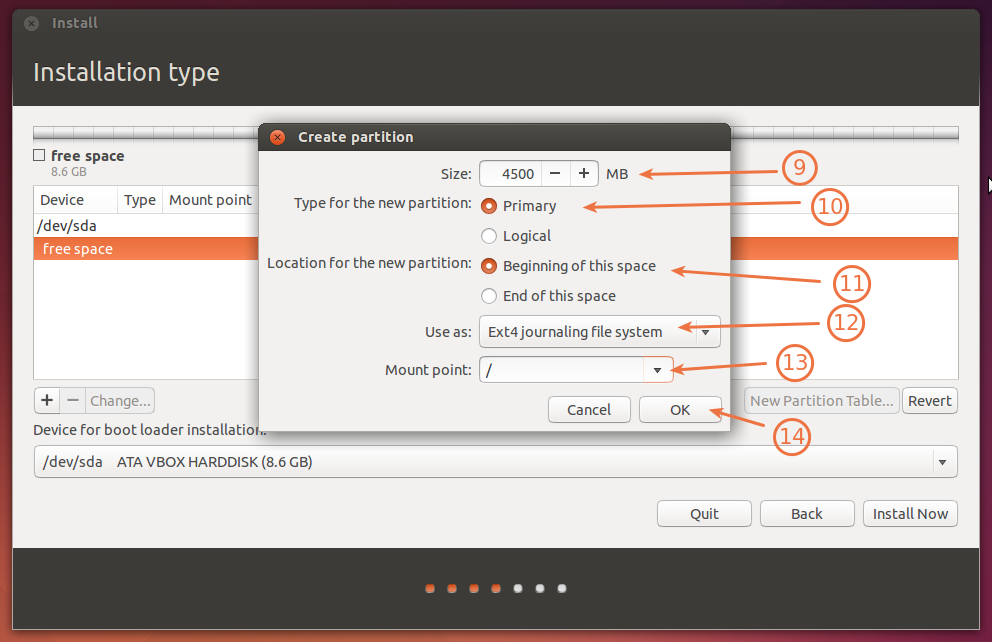
Set and create ROOT partition ” / ”
First, create the root partition.
9. Size: The best and most economical way to assign 10,000 to 20,000 MB. Less than 10 GB is perhaps not enough if you plan a lot of applications.
10. Select Primary type for new partition
11. Select beginning of this space
12. Select from the drop-down menu Ext4 journaling file system
13. Select from the drop-down menu or enter by hand: /
/ is the mount point for root partition, alpha, and omega of the Linux system
14. Press OK after all that.
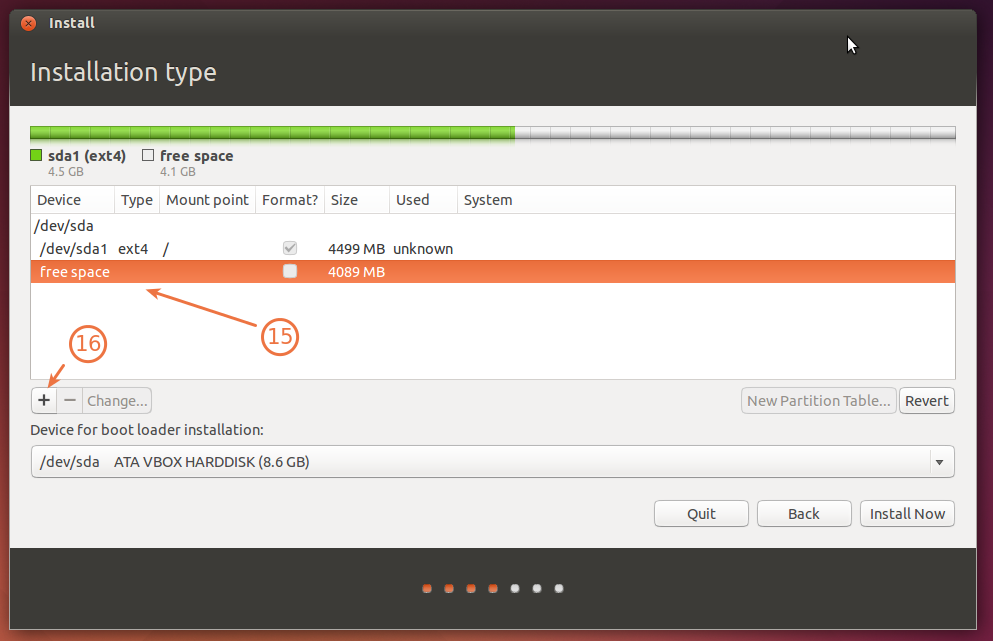
Now in the disk partition table we can see a new partition labeled: /dev/sda1
15. To create new(next) the partition select free space from partition table.
16. Select + to set new partition
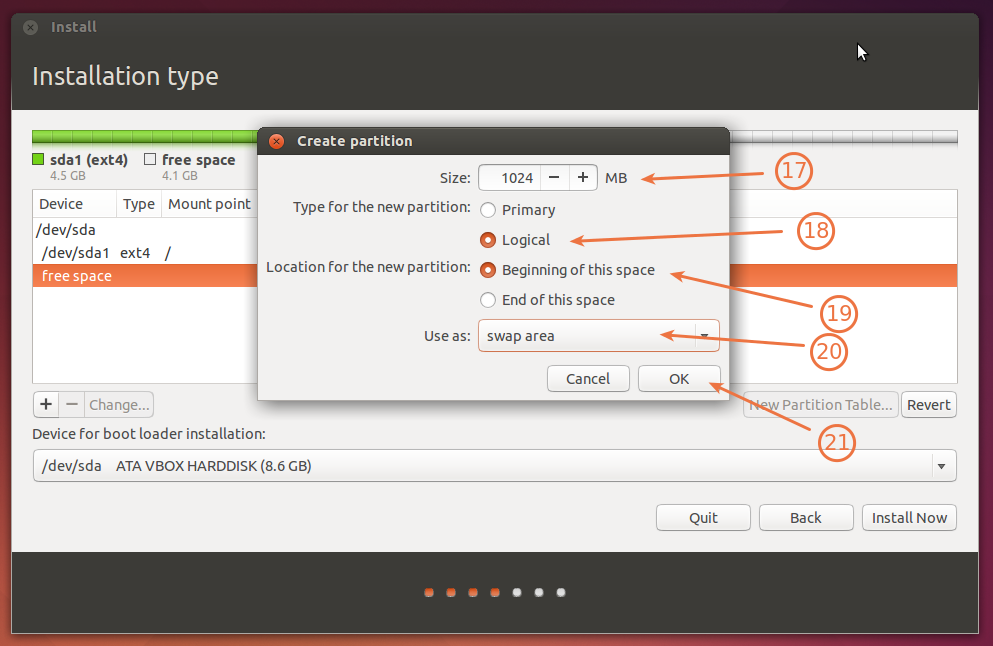
Set and create Swap partition
17. Size: While there was a large amount of memory (256,512.. MB) it was the rule 1xRAM=2xswap (1GB RAM= 2GB swap). Now that we all have at least 2,3,4 GB of RAM its enough to separate the 1-2 GB for swap. I have 4 GB of RAM, and 1 GB swap space.
18. Select Logical (if it is not already selected automatically) for the Type of new partition.
19. Select Beginning of this space
20. Select swap area from the drop-dawn menu.
21. Press OK after all that.
We can see now that we have two new partitions in the partition table.
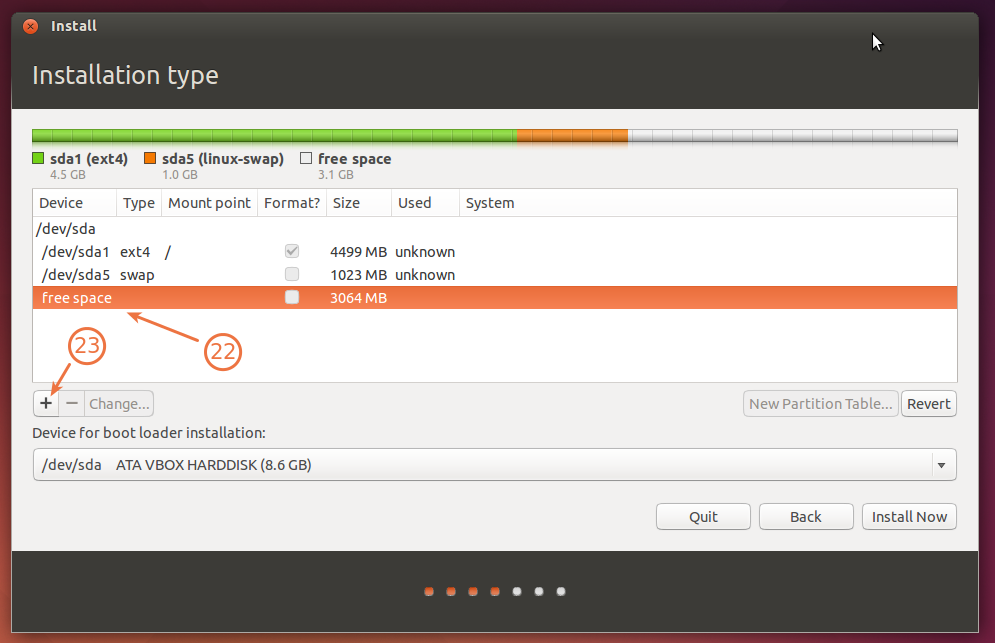
22. to create new(next) partition select free space in the partition table.
23. Press + button to set and create new partition.
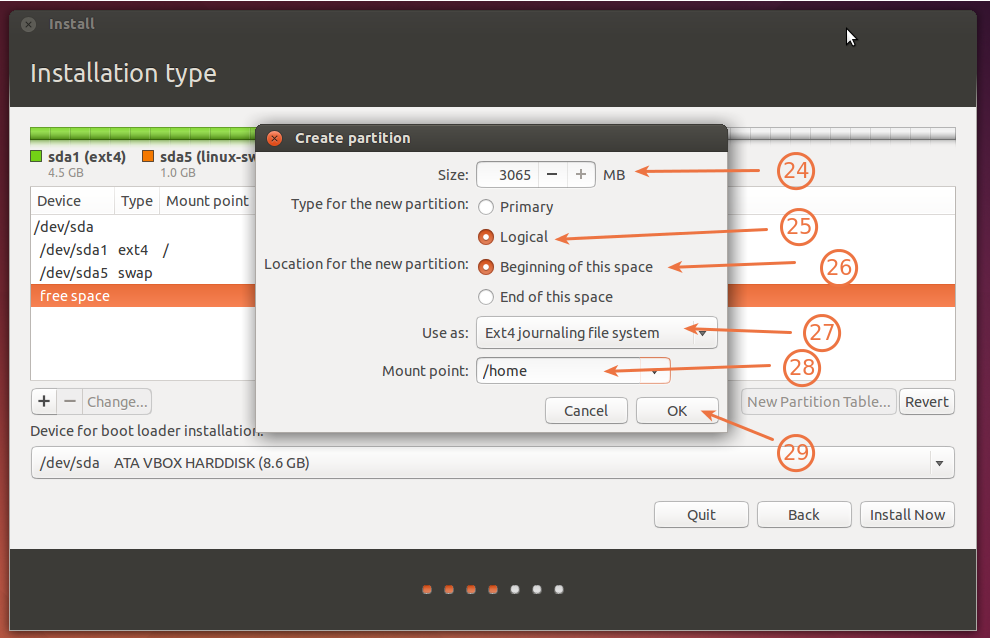
Set and create /home partition
Home partition is for all your user files which is music, videos, pictures, files, more and more together whit personal user settings in hiden files of the home partition(but that’s another story and it should not interest you at this time).
To create this partition folow these steps and you can freel the entire remaining space of the hard disc.
24.You can freely assign the entire remaining space of the hard disc.
25. Select Logical for type for the new partitio
26. Select Beginning of this space.
27. Select Ext4 journaling file system from the drop-dawn menu.
28. It is important to select /home for the mount point from the drop-dawn menu.
29. After all that press OK button.
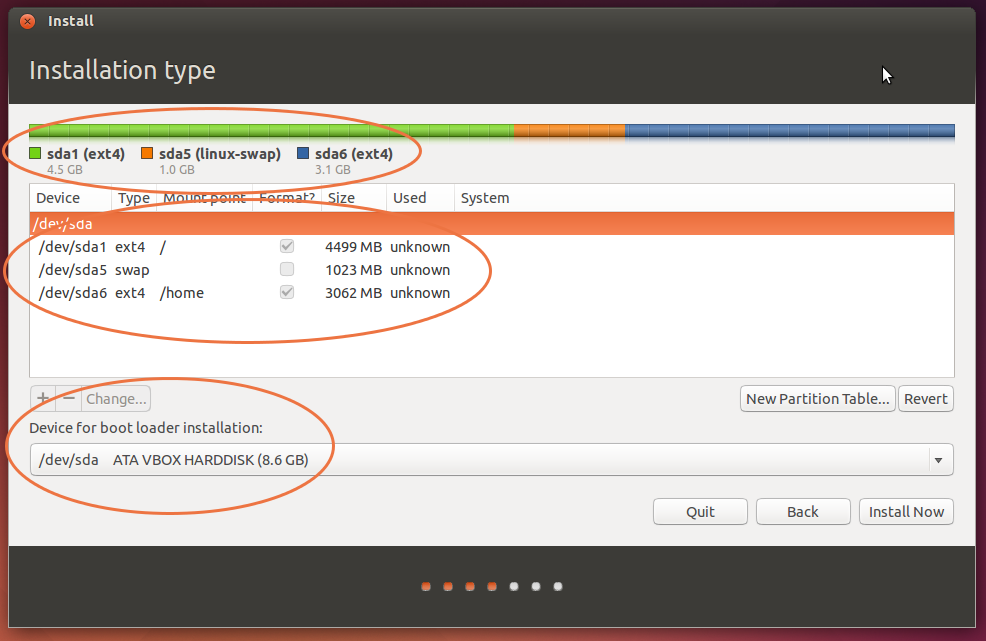
Now we can see three partitions in our partition table and that is all our job with partitions. Double-check whether the boot device marked as /dev/sda.
Write down somewhere on the side that you partition the disk labeled:
root /sda1
swap /sda5
home /sda6
Press Install Now to continue.
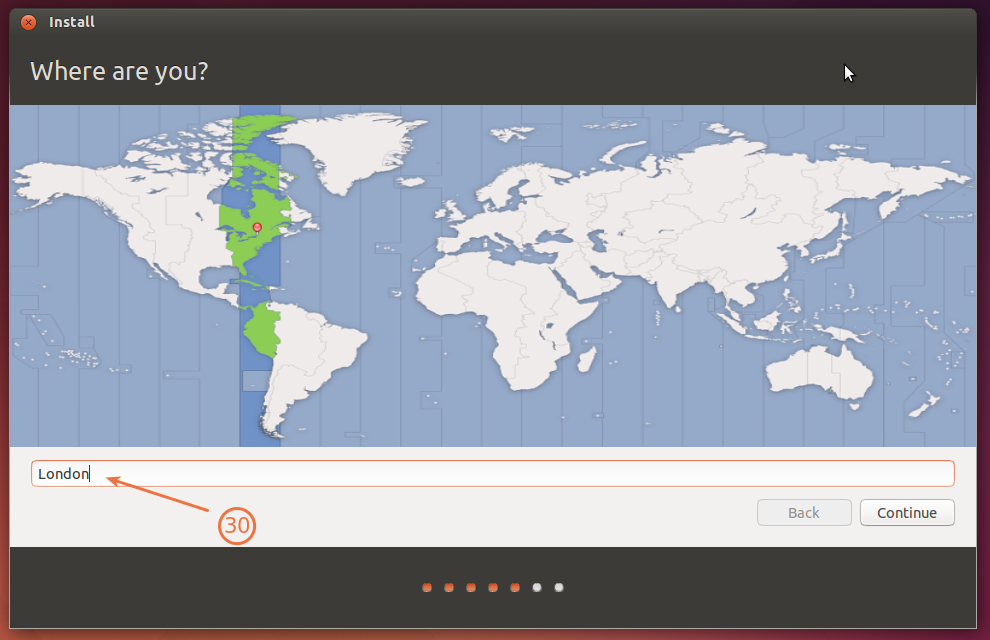
30. Set your location.
31. Select your language.
32. Select your keyboard layout.
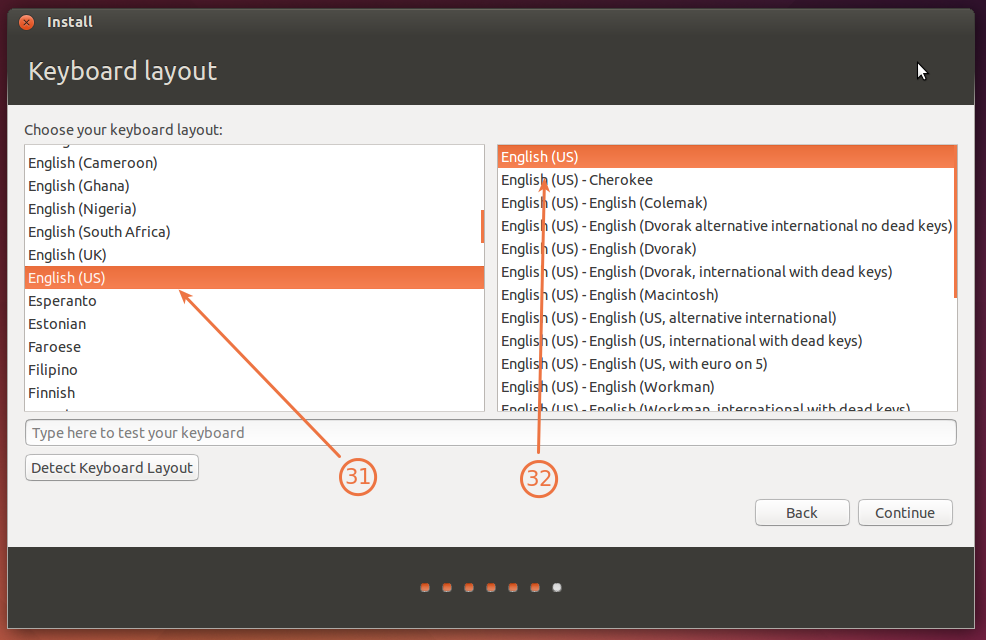
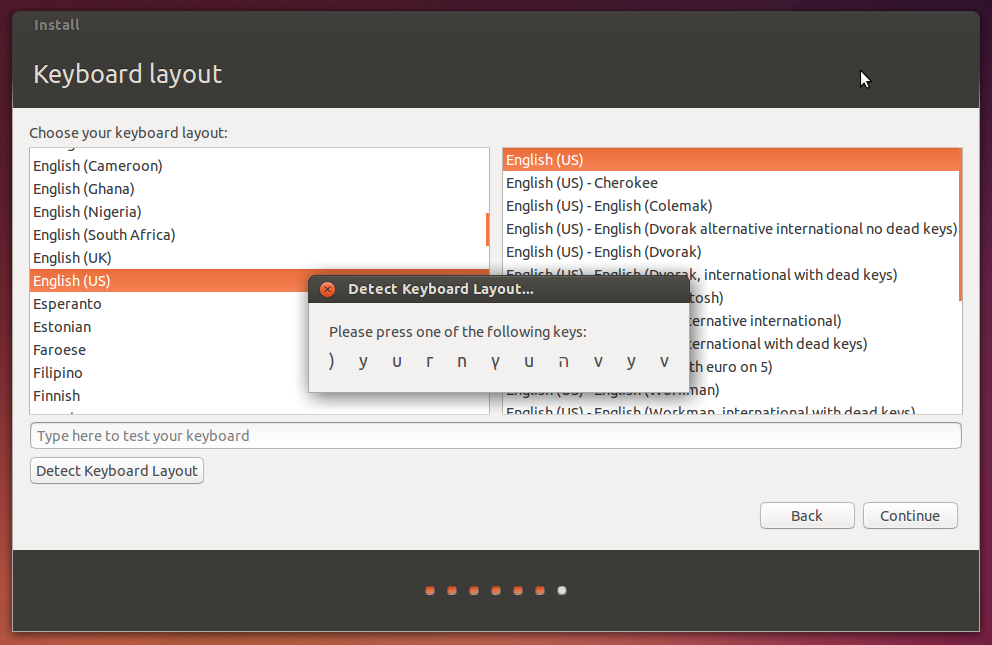
or detect keyboard layout:
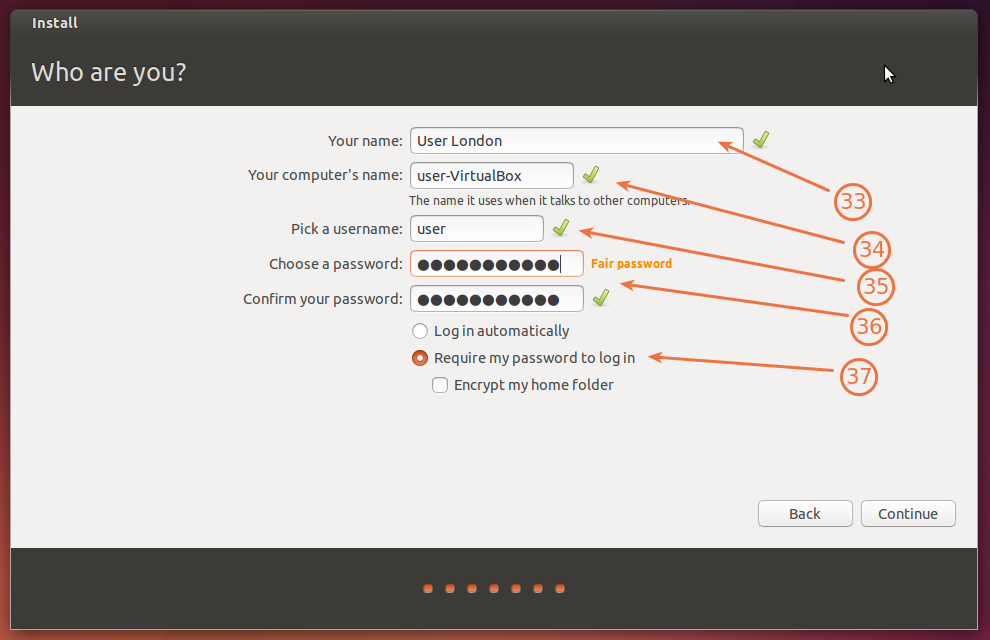
33. Write your name.
34. Write your computer’s name if you don’t like the automatic choice.
35. Pick a username.
36. Set your password.
37. Select how do you want to login to the system. Automatic or Require password login.
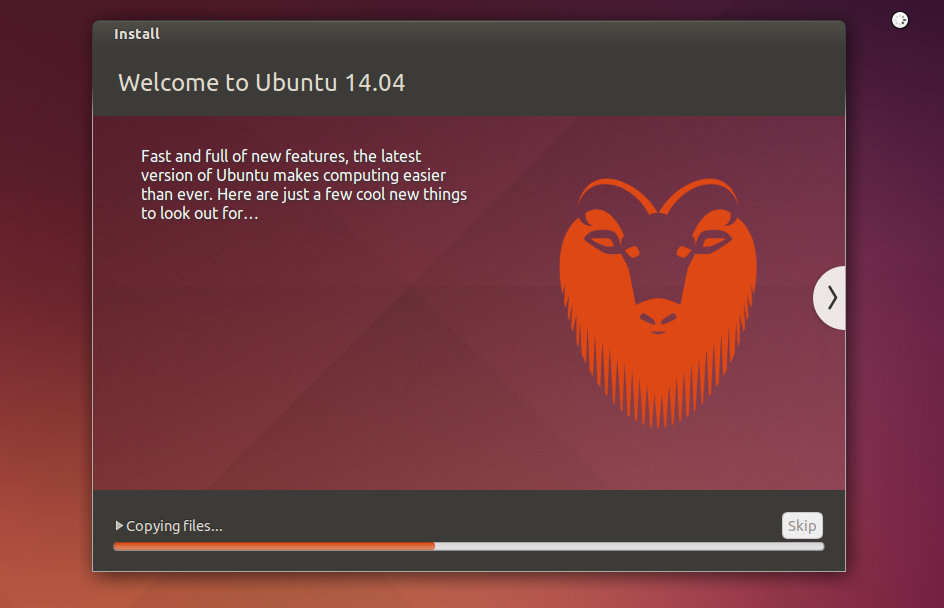
Welcome to Ubuntu!
Wait 15-25 minutes to complete installation and that’s it! 🙂
This is the procedure to install the Ubuntu operating system on completely empty, new, or deleted hard disk. Also, this is the answer to beginners question: How to install Ubuntu (any edition) on an empty hard disc? The procedure to install Ubuntu on the disk with existing partitions is part of a brand new story that I will write soon.
