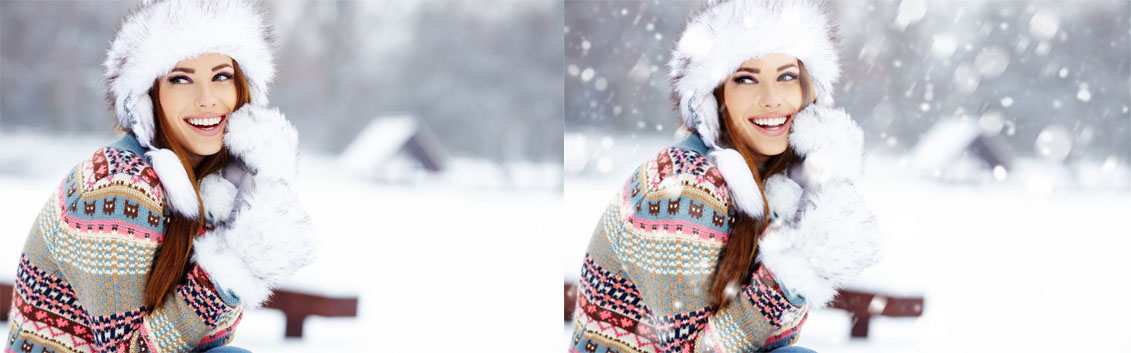
Instructions for adding snowflakes on winter photos
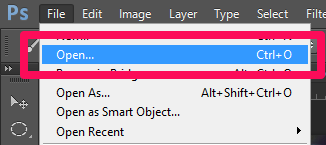
Open the photo where you want to make adding snowflakes. Go to File, Open or use the Ctrl + O. In the window that opens, find the planned image and select it:
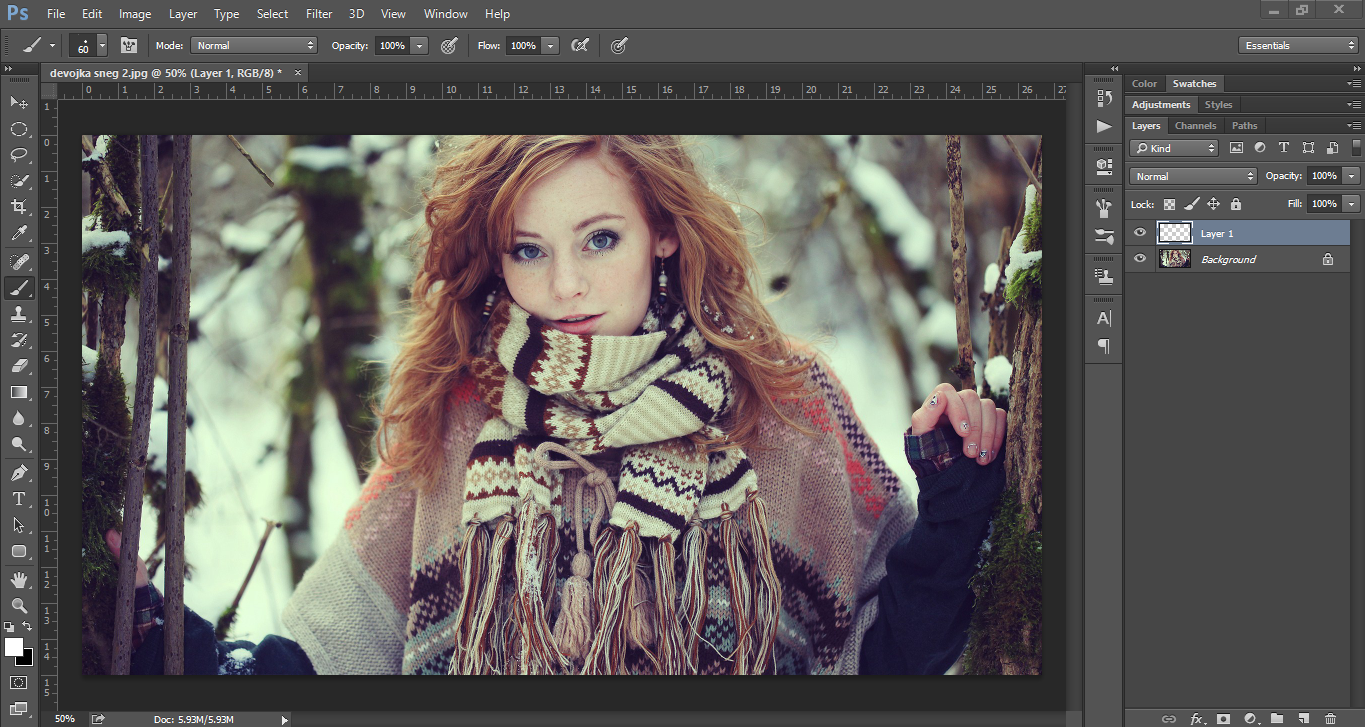
 It is preferred that it be winter photos with snow can be seen in the background. The aim is to create a realistic scene to the extent that conditions allow.
Before doing anything in the picture where we want to add snowflakes, you should first make snowflakes. We do it with the help of brushes for Photoshop that we make ourselves.
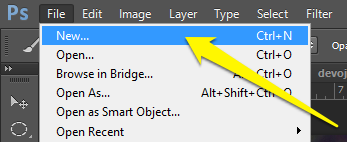
Create a new document sized 500×500 px. Go to File-New:
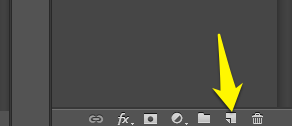
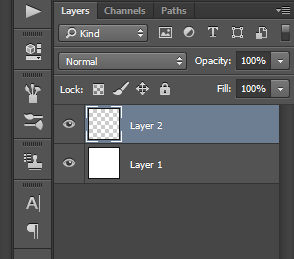
Add a new layer by clicking on the icon Create New Layer:
The new layer is added.
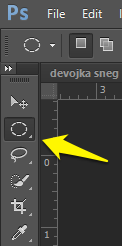
Select a tool called the Elliptical Marquee Tool (keyboard shortcut button M).
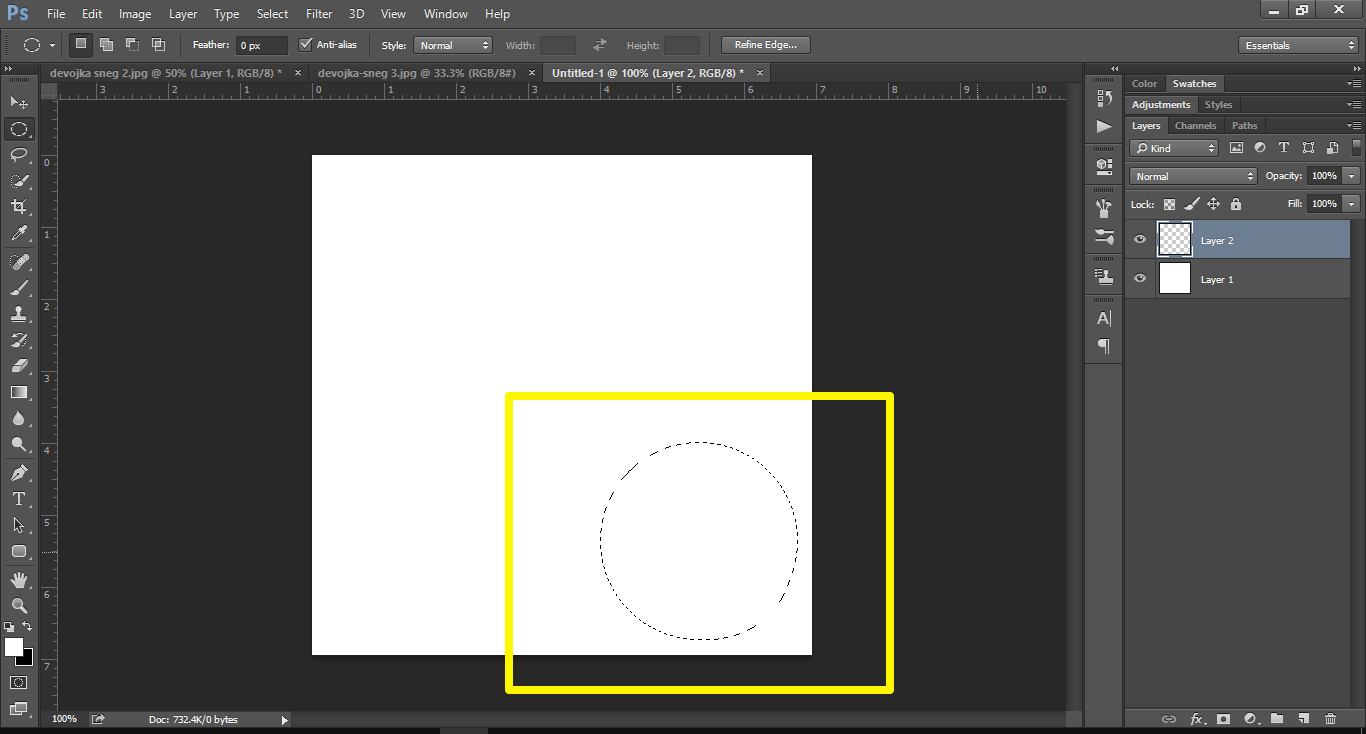
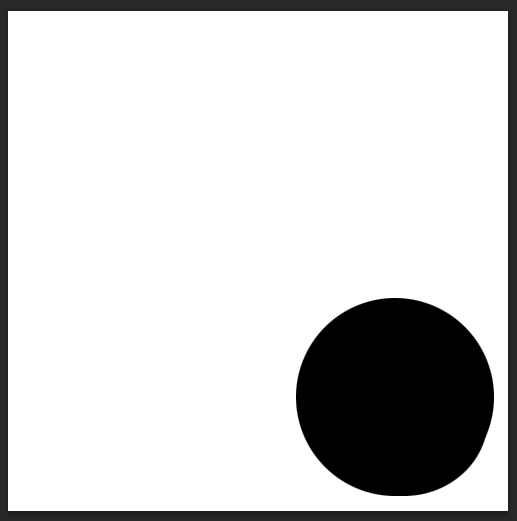
In the lower corner (it does not matter whether the left or right) Draw a circle. To drop the perfect shape hold Shift while you drag the mouse. In the picture below you can see how it looks. You do not need to be particularly precise in terms of size.
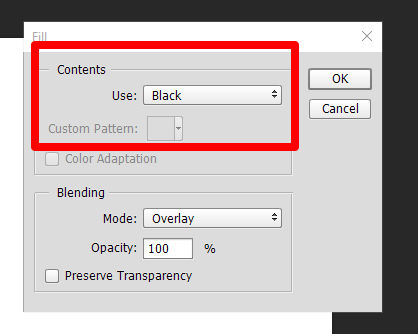
Fill the circle with black paint. Use Shift + Backspace, and in the window that opens, check the Use Black. Click OK.
The circle is filled with black paint. Why black? Brushes for Photoshop are Grayscale, which means it may contain only black, white or shades of gray between these two.
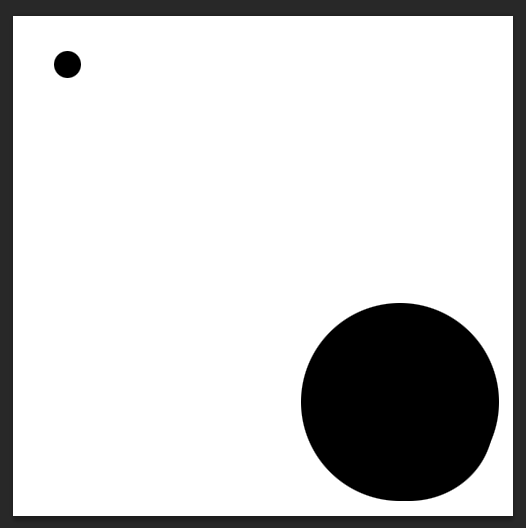
On the opposite side of the same layer draw another smaller circle. See image below. You do not have to be precise when it comes to size.

And this circle for the same reason in the same way should be filled in black. It looks like this:
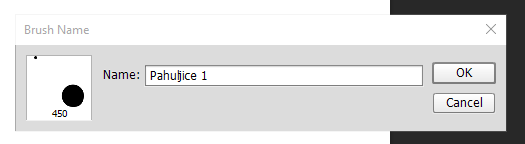
Now go to Edit-Define Brush Preset … to save a new brush

In Name field enter the name you want to assign to the brush. You can put it to be snowflakes. Click on OK to save.
We made a new brush that we need to add snowflakes. We saved it and now it should be used. You can close a document with circles because it is no longer needed.
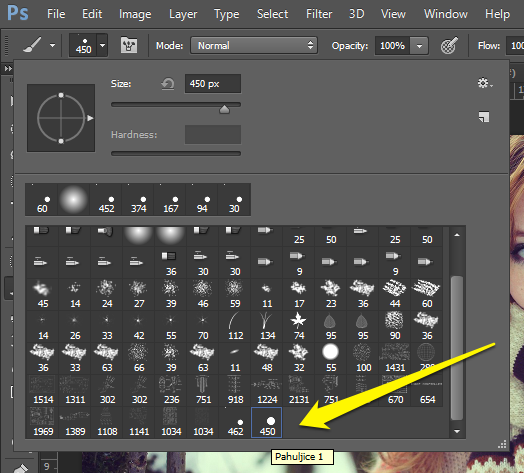
Select the Brush Tool and in the brush window select the one that you just saved:
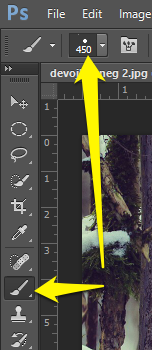
Probably the last on the list:
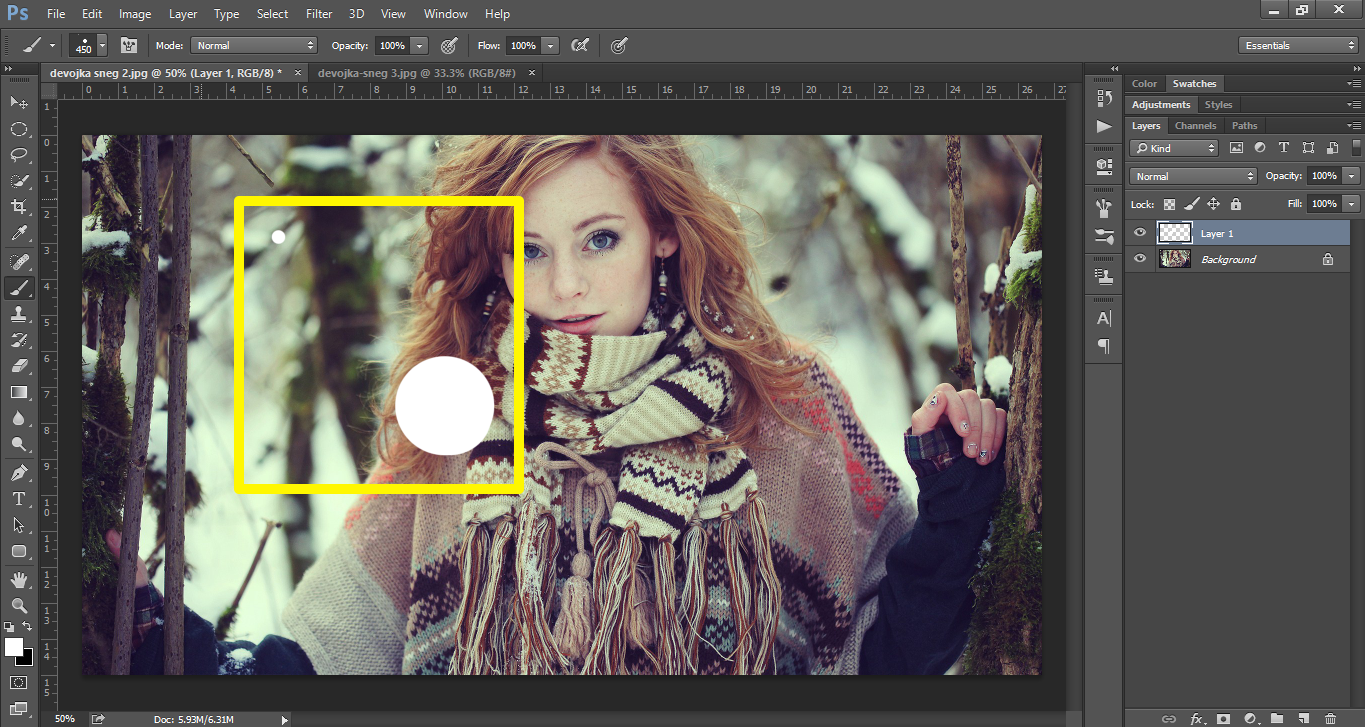
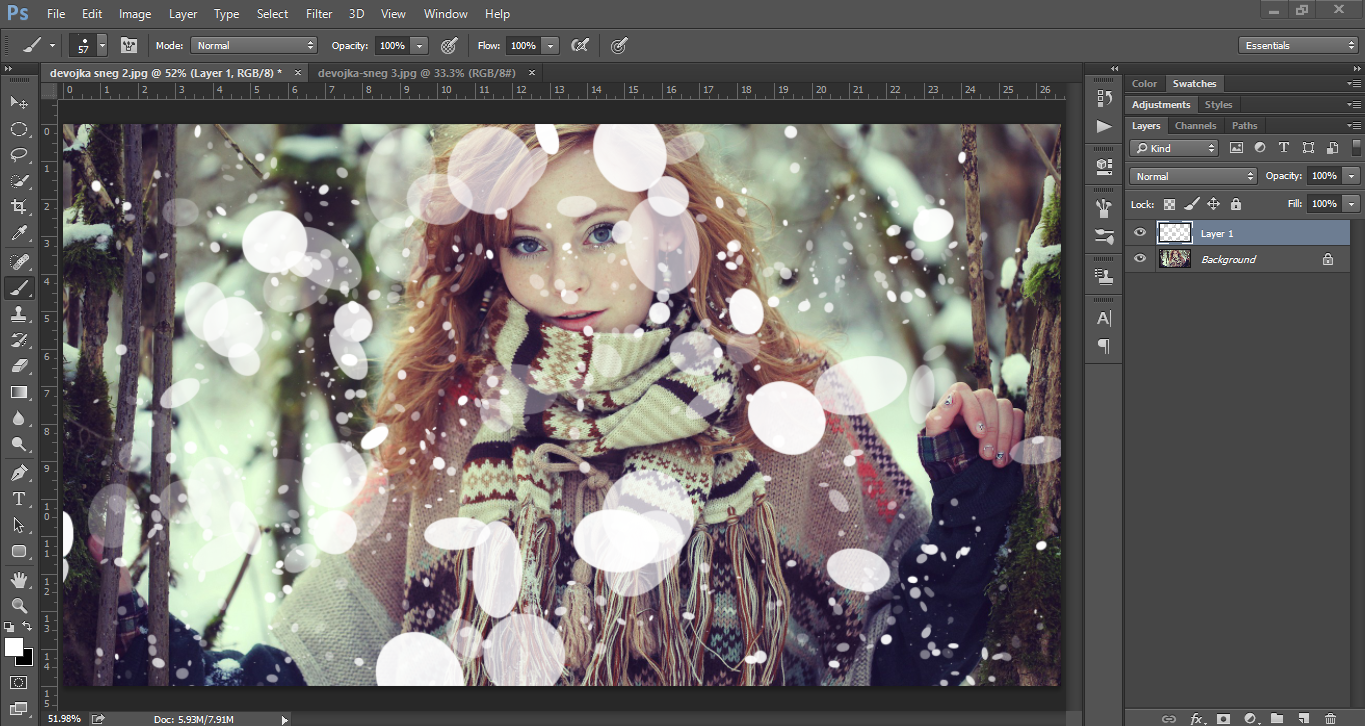
You can try it in a layer which we initially added over the original image. Does not look like much on the snowflake? Now we need to adjust a few things around the brush to make it more useful to us in our task.
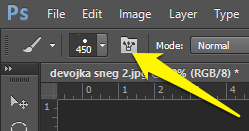
Open the Brush panel:
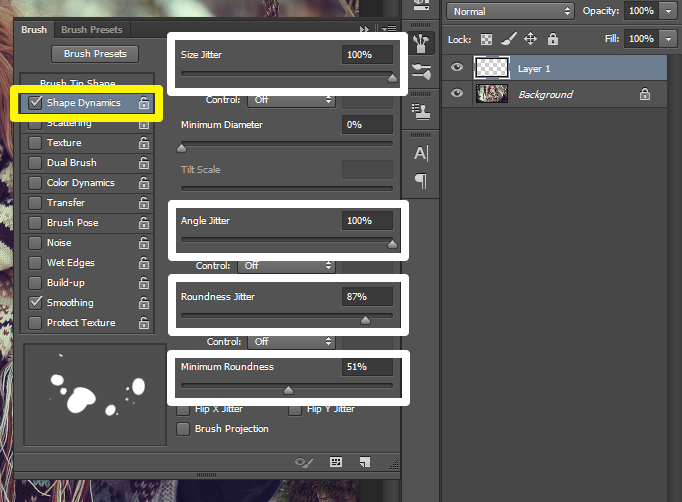
Select (check it if this does not happen automatically when choosing) Shape Dynamics.
- Put Size Jitter slider set at 100%
- Put Angle Jitter slider set at 100%
- Put Roundness Jitter slider set at about 80% (try it yourself)
- Put Minimum Roundness slider set at about 50% (try it yourself)
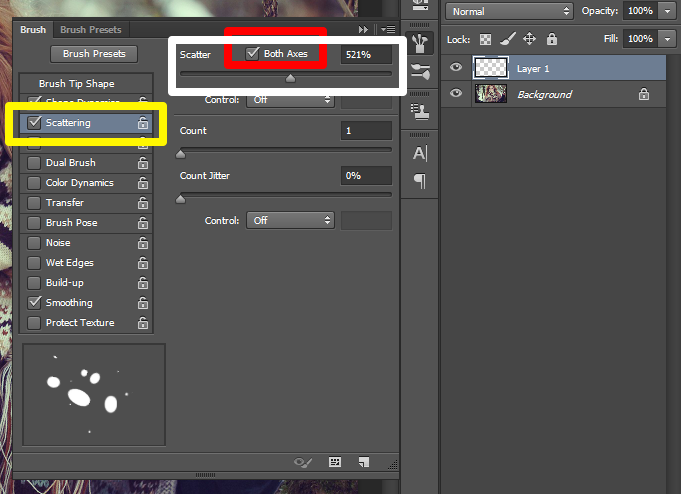
Select Scattering and set using the following settings:
- Check it Both Axes
- Try it many variations while you exercise, 500-800% should be good
Click on Transfer and set Opacity Jitter to 100%:

Try it brush over layer that we made at the beginning over the original photo. It’s already different. Is not it?
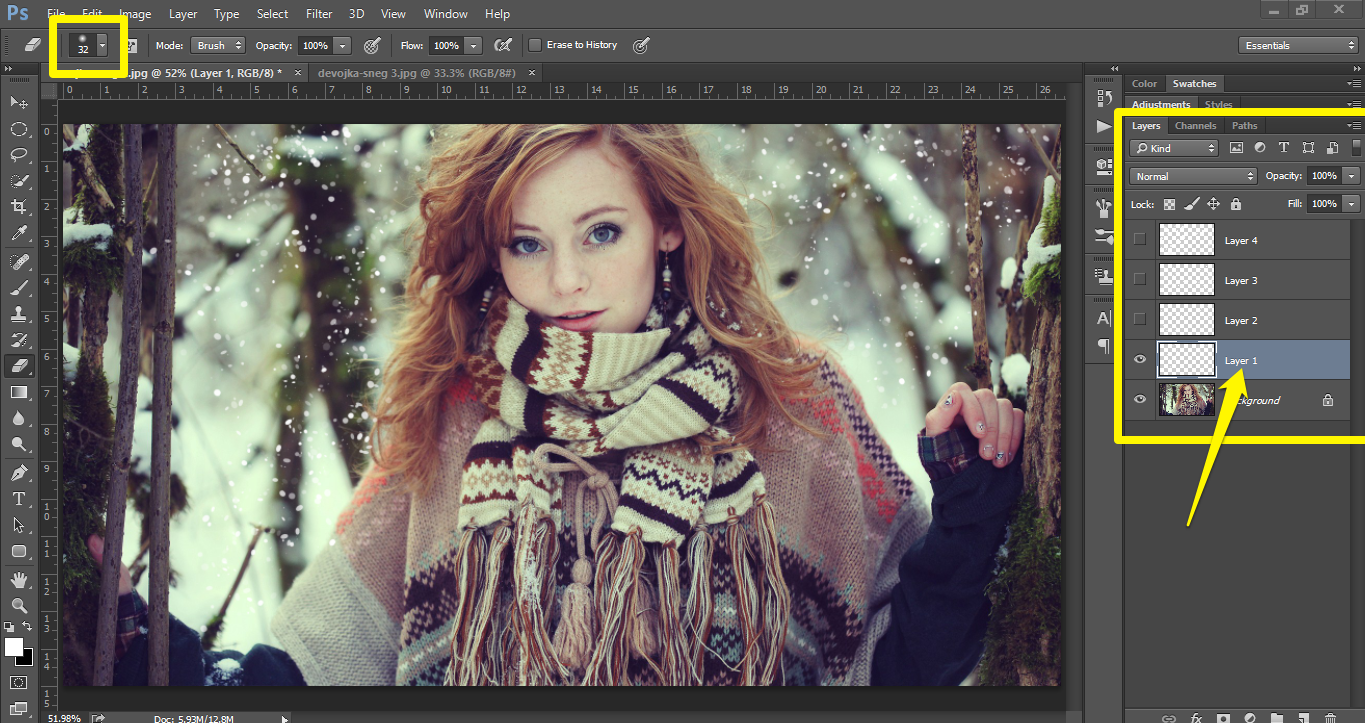
Delete the layer where you are now trying on the brush. Create a new blank, clean layer in a way that we saw at the beginning. We will need 4-5 new layers, so they can make right now.
Select the first layer (you can disable the other by clicking on the icon with the eye in front layer). Set the brush size to about 30 (+ -10). In this layer we will add snowflakes that can be seen in the distance. Add flakes (not yet look like, but do not worry). Just drag over with left click.
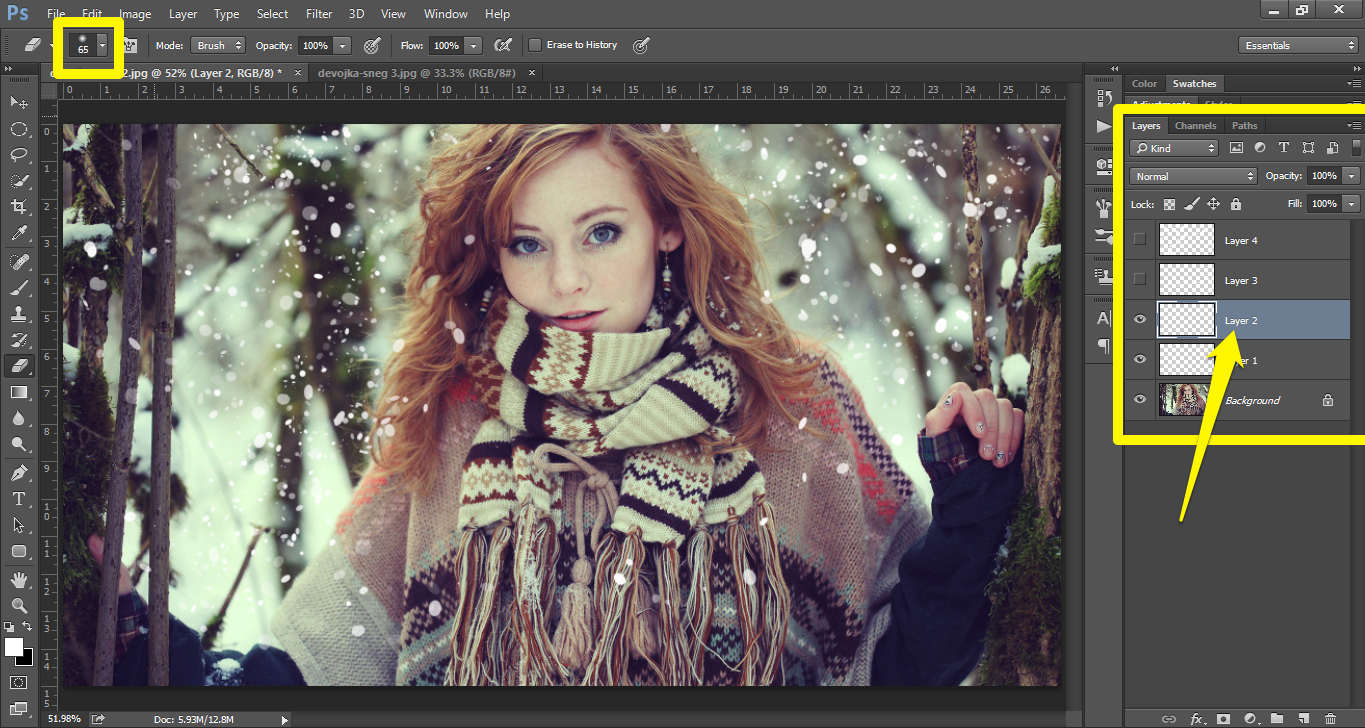
Select now the second layer and increase the brush size (double, or try it for yourself). Apply snowflakes.
Select now the third layer with even greater size of the brush because now apply snowflakes that are even closer to the camera.

Select the fourth layer and increase the brush. Apply snowflakes that literally fly in the frame. We now have four layers with different sizes snowflakes depending on the distance from the camera. We’re doing it because it is important for us to be as close as possible to natural look.
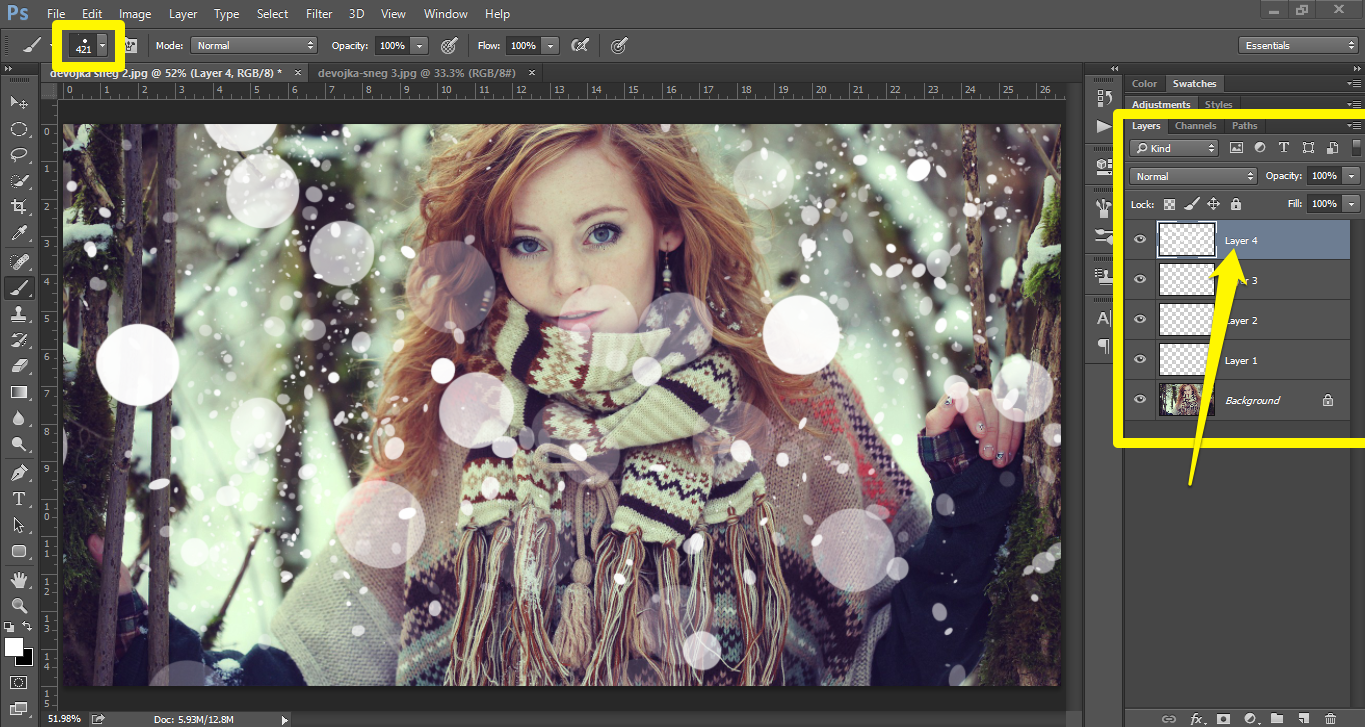
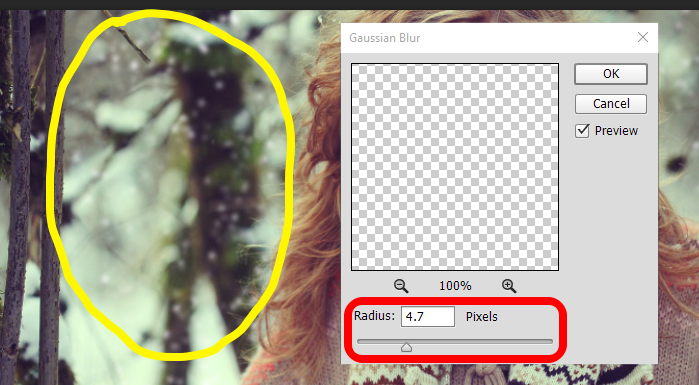
Select again the first layer with the smallest, most distant snowflakes. Other layers you can turn off while doing this. It will be easier that way.
Go to Filter – Blur – Gaussian Blur.

Set the Radius so that the snowflakes look like they are in the distance. You can see it, but did not fall so much in the eye, just unwittingly give a picture that snow falls in the distance, and not just in front of us. Click OK when you find the right value.
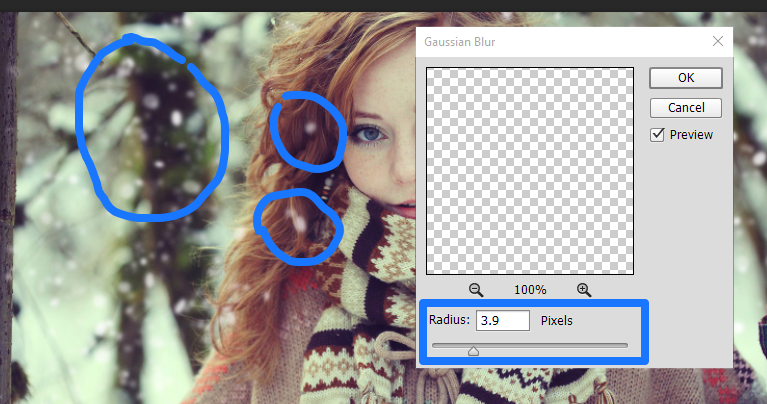
Do the same with the next layer. This time, use a smaller radius as these are now the snowflakes that are closer to us and more visible.
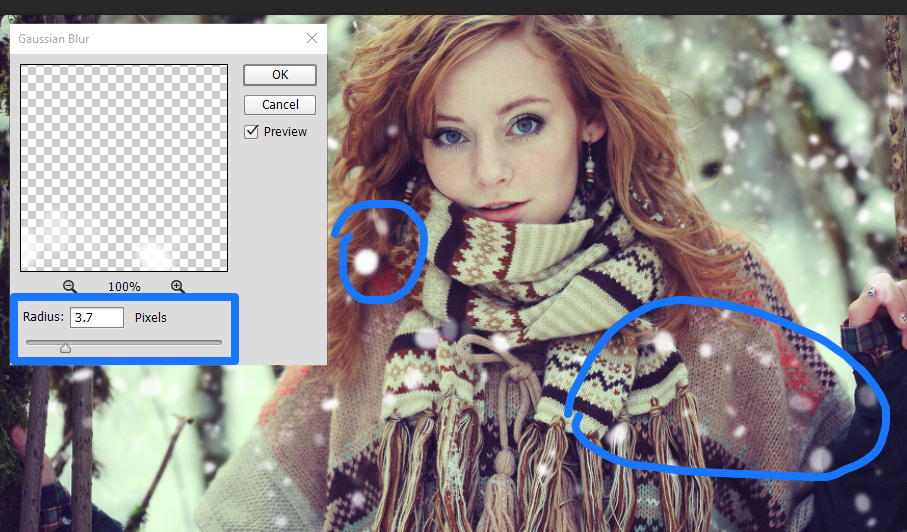
Similarly with the third layer. Each time you use the smaller radius as you approach the camera.
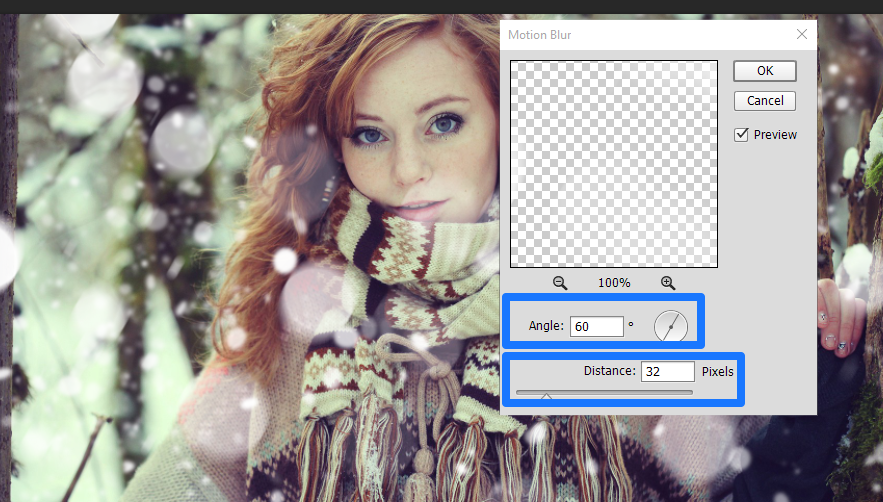
This last layer should be treated differently. Go to Filter – Blur – Motion Blur.

Angle of 60 degrees is good, but you try to set the value that you prefer. Distance about 30 px is satisfactory, but still try to find a value that best matches the environment in the picture. Click OK.
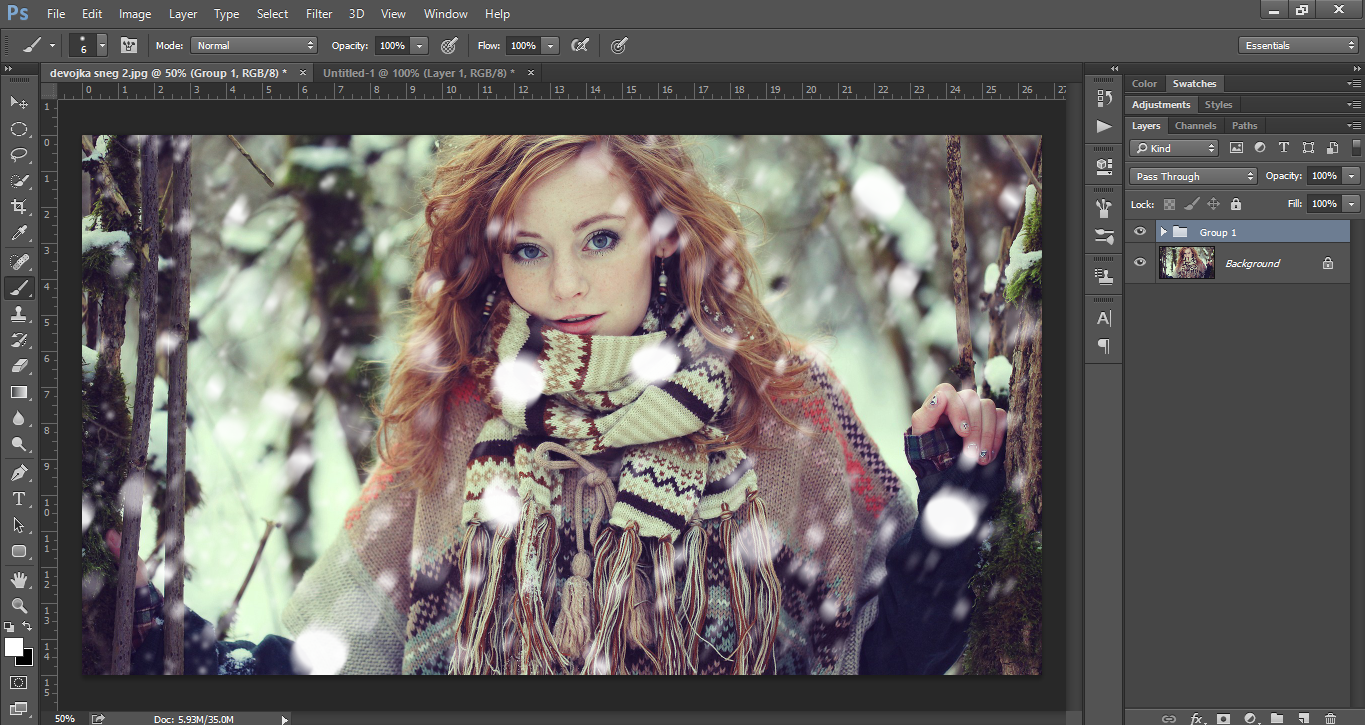
Each layer can further edit. Some snowflakes can delete by using Eraser Tool (keyboard shortcut button E). To delete a snowflake, select the layer in which it is located and use the Eraser Tool.
Layers with snowflakes and can move with the help of Move Tool (keyboard shortcut button V) if you want them to another place, and adjust better to the space.
In the same way, you can edit various images. It is important to achieve the most natural-looking effect snow that falls. Depending on the perspective and background images you’re editing, you can add more layers to correct size and blur (Blur) themselves snowflakes.
Adjust the settings for each image you are editing
This manual is not as universally applicable. However, in all settings that I listed above you can find enough information to continue learning, promotes and maintains it and let me know that you have mastered what I have presented here.
Good luck! 🙂
